
In this tutorial we are going to install Strapi on your computer. We will then setup a database complete with forms for easy content management and creation. The dataset we are going to build for this example is a collection of paintings, artists and museums but anything will do.
Disclaimer: this tutorial is written for MacOS. Everything should work on Windows and Linux too, but there might be a little bit of Googling to do.
Strapi is written in JavaScript and runs on Node.js which we have to install first. But what is Node.js and why do we need it?
JavaScript is a scripting language (which is very similar to a programming language) that was originally used to manipulate websites. You can use it for instance for sorting data inside a table alphabetically or filter out rows that contain a certain word or string. Text files with JavaScript code in it are not applications, but the instructions for the web browser, which understands, or interprets, the code. Another way to think of it is to look at Google Docs. The actual application running on your computer is your trusty old web browser and Google Docs is basically just a set of scripts that run inside the browser.
To be able to run JavaScript code outside of the browser as a more general purpose programming language directly on your computer, we have to install Node.js. This is similar to installing Python, Ruby or PHP to run code written in those respective languages.
Download and install Node.js
Download Node.js here nodejs.org and run the installer. The current LTS version is 12.4.1 but click the button that says Recommended For Most Users.
LTS or Long Term Support means that the developers of the software guarantee updates and fixes for security and stability for a certain period of time. A newer version might be available with state-of-the-art features but without the guaranteed Long Term Support. Click here to see a diagram of the Release Schedule for Node.js.
It is possible that MacOS prevents you from opening the installer, with a warning message that it cannot verify the developer. In that case, go to System Preferences -> Security and Privacy and under the General tab click on Open Anyway at the bottom. For more information visit the Apple documentation page on this subject.
Node.js comes with an additional application called NPM or the Node Package Manager. It is a bit like the App Store on your Mac, as it is used to install, uninstall, update and launch applications written for Node.js. It does not come with a Graphical User Interface (GUI) so you have to interact with it using the Terminal.
Open Applications/Utilities/Terminal on your computer or click CMD + Spacebar and search for Terminal using Spotlight. Since you will use Terminal quite a bit, it might be a good idea to give it a permanent place in your Dock.
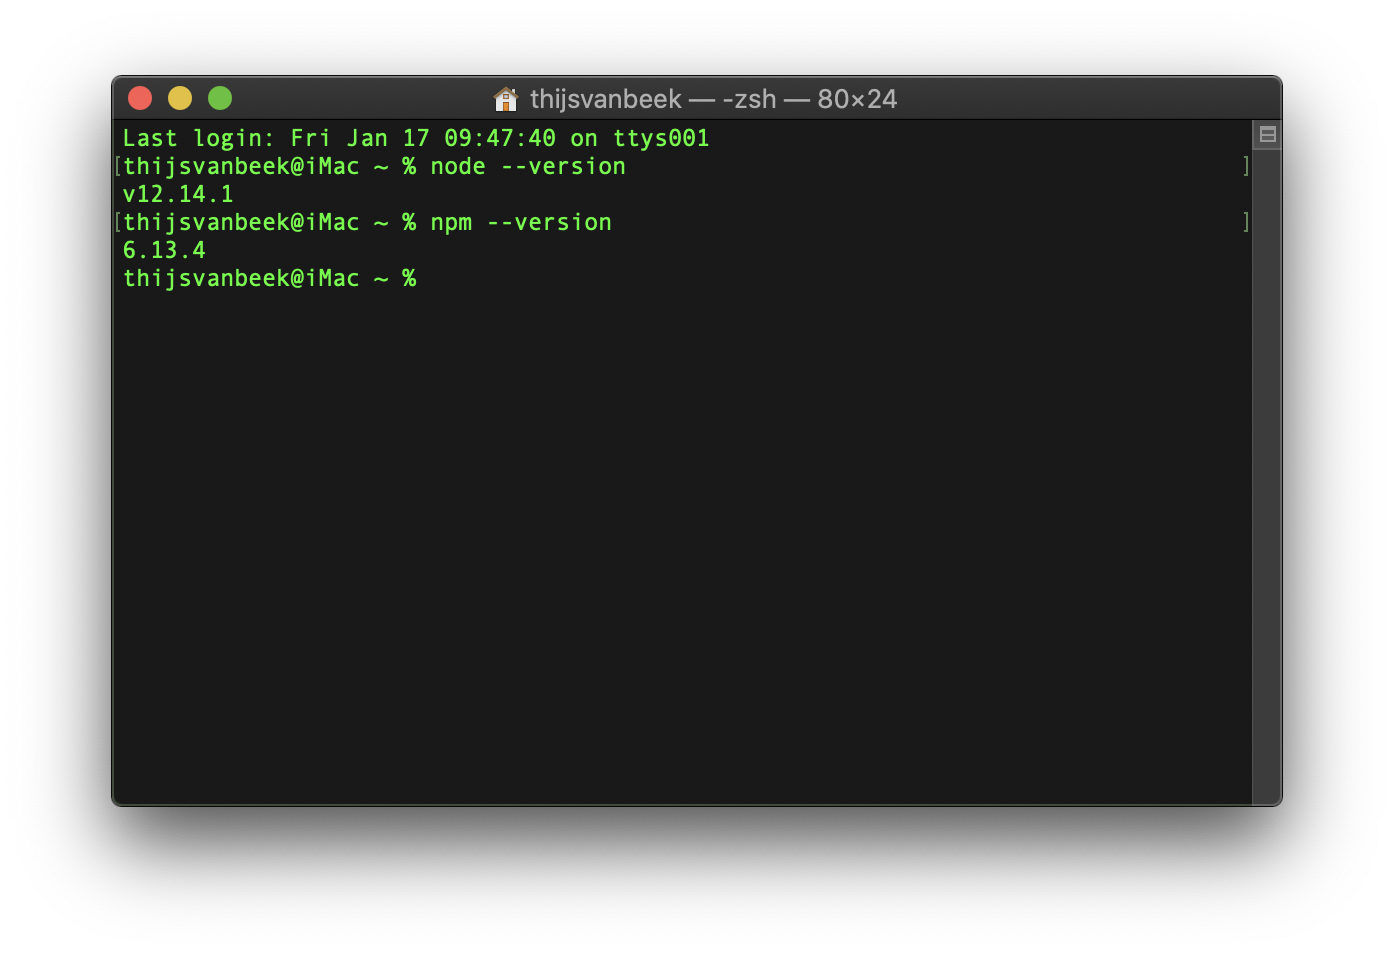
We want to verify that Node and NPM have both been installed correctly. Type node --version and hit Return. Repeat with npm --version. This returns the version-numbers of Node.js and NPM on your computer and verifies a successful installation.
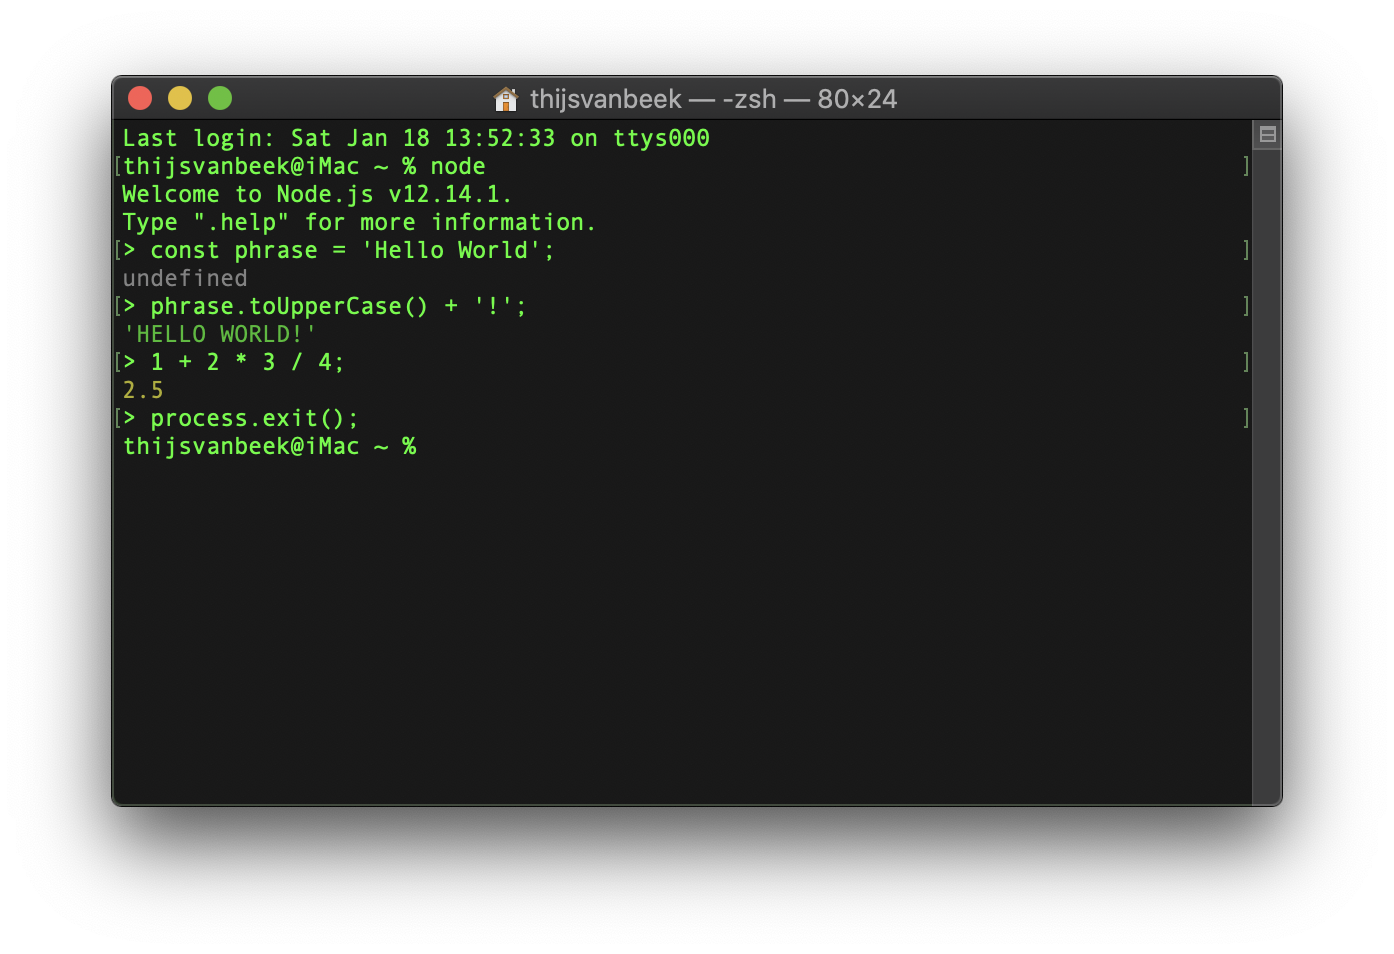
With Node.js installed it is possible to run JavaScript code from inside the Terminal, so let’s try that. Type node and press return. This runs Node.js in what is called Node Shell, where we can directly give instructions to Node.js by typing in commands. Type const phrase = 'Hello World'; and on the next line phrase.toUpperCase() + '!';. Next, type 1 + 2 * 3 / 4;. This is all there is to it, you are a JavaScript developer!
In reality, you would store these JavaScript commands in a text file, for instance helloworld.js, and execute them using the command node path/to/helloworld.js, but the result is the same. Now exit node by typing process.exit();.
If you are interested in learning more JavaScript, I recommend starting with this excellent free course Introduction to JavaScript on Codecademy.
Install Strapi
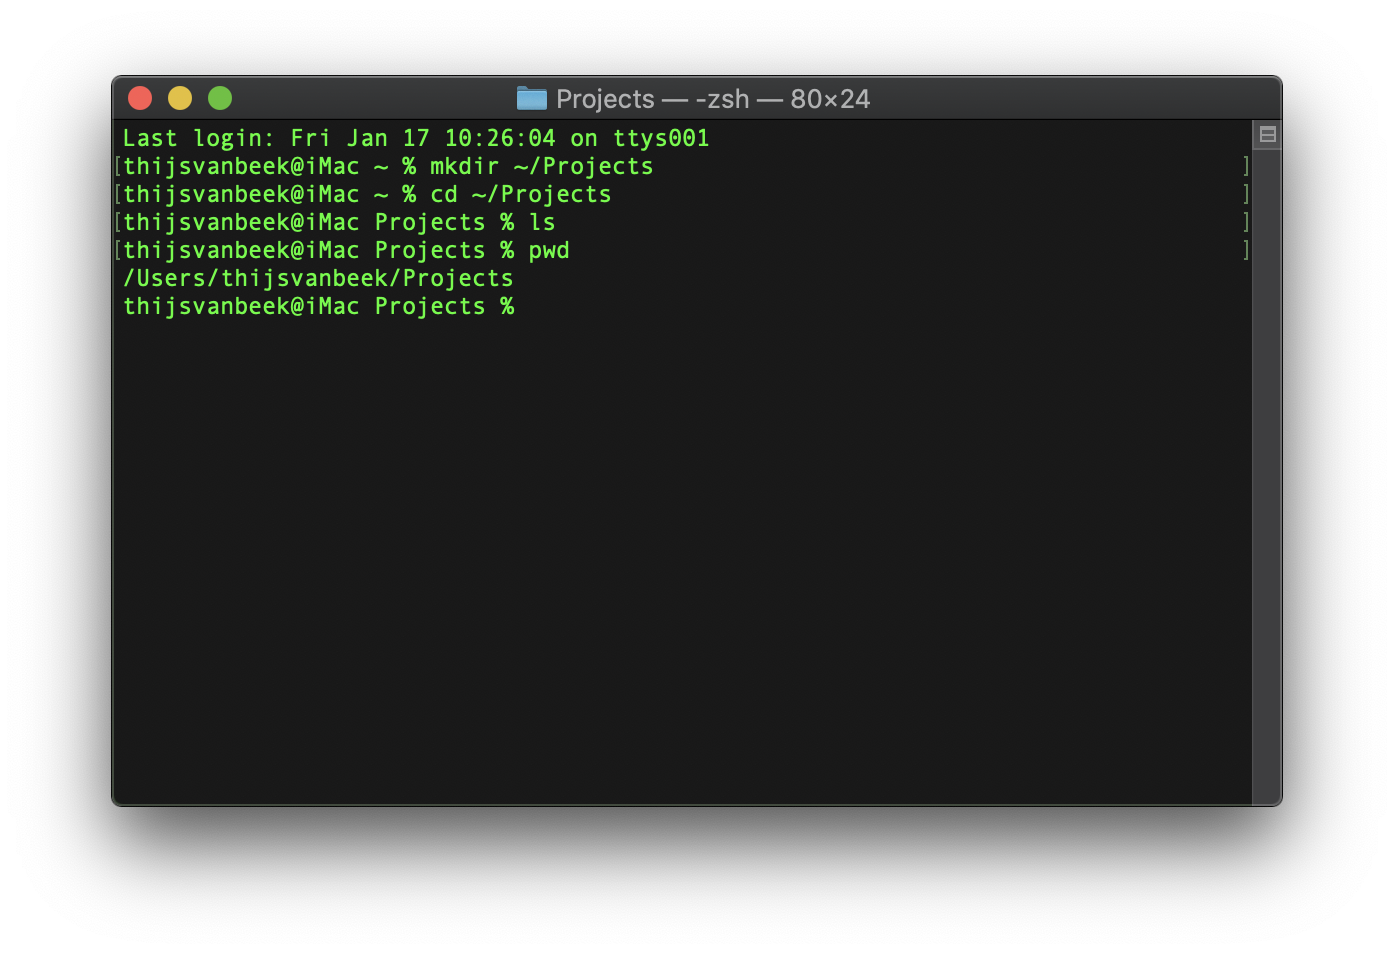
Before we install Strapi, we want to create a folder for our database application. It is up to you where you want your project folders to be, or you can do the following: In the same, or a new Terminal window, type mkdir ~/Projects. The mkdir command means make directory. The second part is a path, where tilde (~) is a shortcut or alias to your Home Directory on your Mac, so the full path of the new folder is /Macintosh HD/Users/yourusername/Projects. We created a new folder called Projects in your Home Directory, but we are not yet in it so type cd ~/Projects. The command cd stands for Change Directory.
A terminal window has (while its not running an application, such as Node.js) an active folder called the Working Directory. It is similar to a Finder window where you are always inside a current folder. It is impossible to have either a Terminal window or a Finder window without being inside a folder.
We are now in the newly created Projects folder, which is empty. To verify this use the List command ls. This shows you all files and folders in the current directory. Finally you can type pwd to Print Working Directory which will show you the full path.
We have created and are in our new Projects folder and we are ready to install Strapi!
Type npx create-strapi-app gallery --quickstart. This downloads and installs Strapi. I have chosen the name gallery for our project but you can change this if you want. The –quickstart parameter (or flag) is optional and installs Strapi with all default settings. If you omit it, you will be asked questions during installation.
npx is a helper tool for NPM, which will download the installer you want to run (in our case create-strapi-app), runs it, and then removes it all in one command, instead of doing it manually with the npm command.
The installation takes about a minute or so. After the installation the application will start automatically, but for the sake of this tutorial we are going to start it manually.
Wait until the installation is completed. Then, Terminate Strapi by closing the Terminal window. Open a new Terminal window and type cd ~/Projects like before. Now, if you type ls you will see that there is a folder called gallery inside the Projects folder. Change to this folder by typing cd gallery. Alternatively you can type cd ~/Projects/gallery which takes you to the gallery directory immediately.
To start the Strapi gallery application, type npm run develop from this folder.
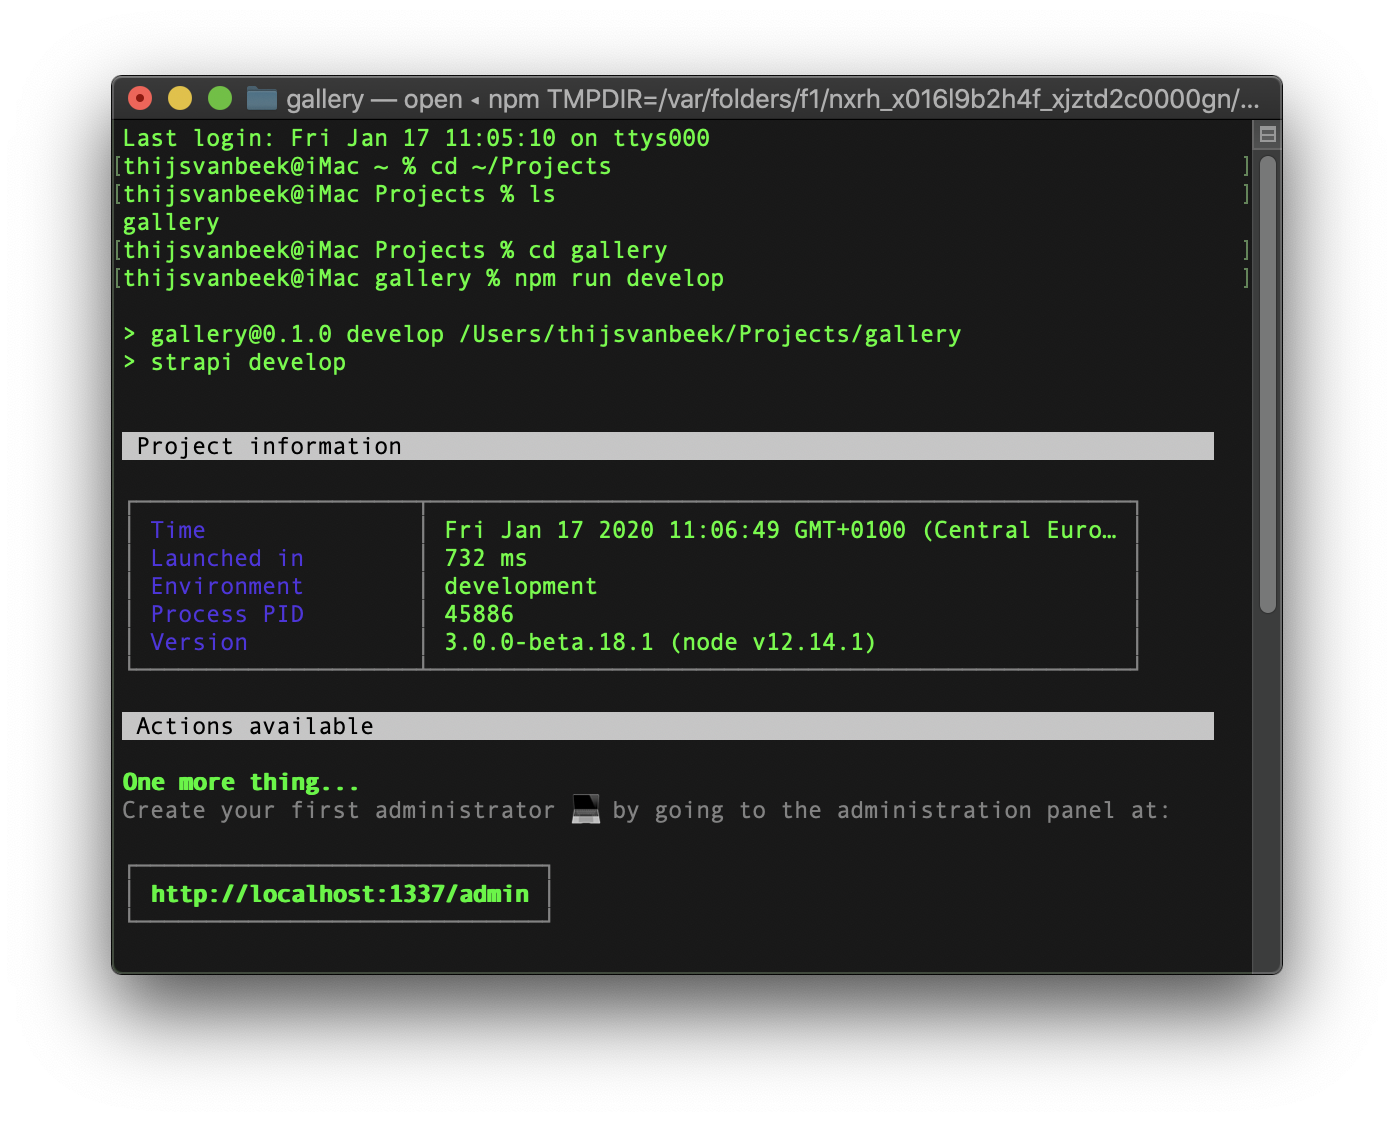
As you now know, npm is the application we use to start applications for Node.js like Strapi, run is the command we give to NPM, and develop is the script we want to execute which is defined in the file package.json. There are other scripts there too, but you will not need them now or perhaps ever. Strapi will start, a browser window will open automatically and ask you to make an administrator account.
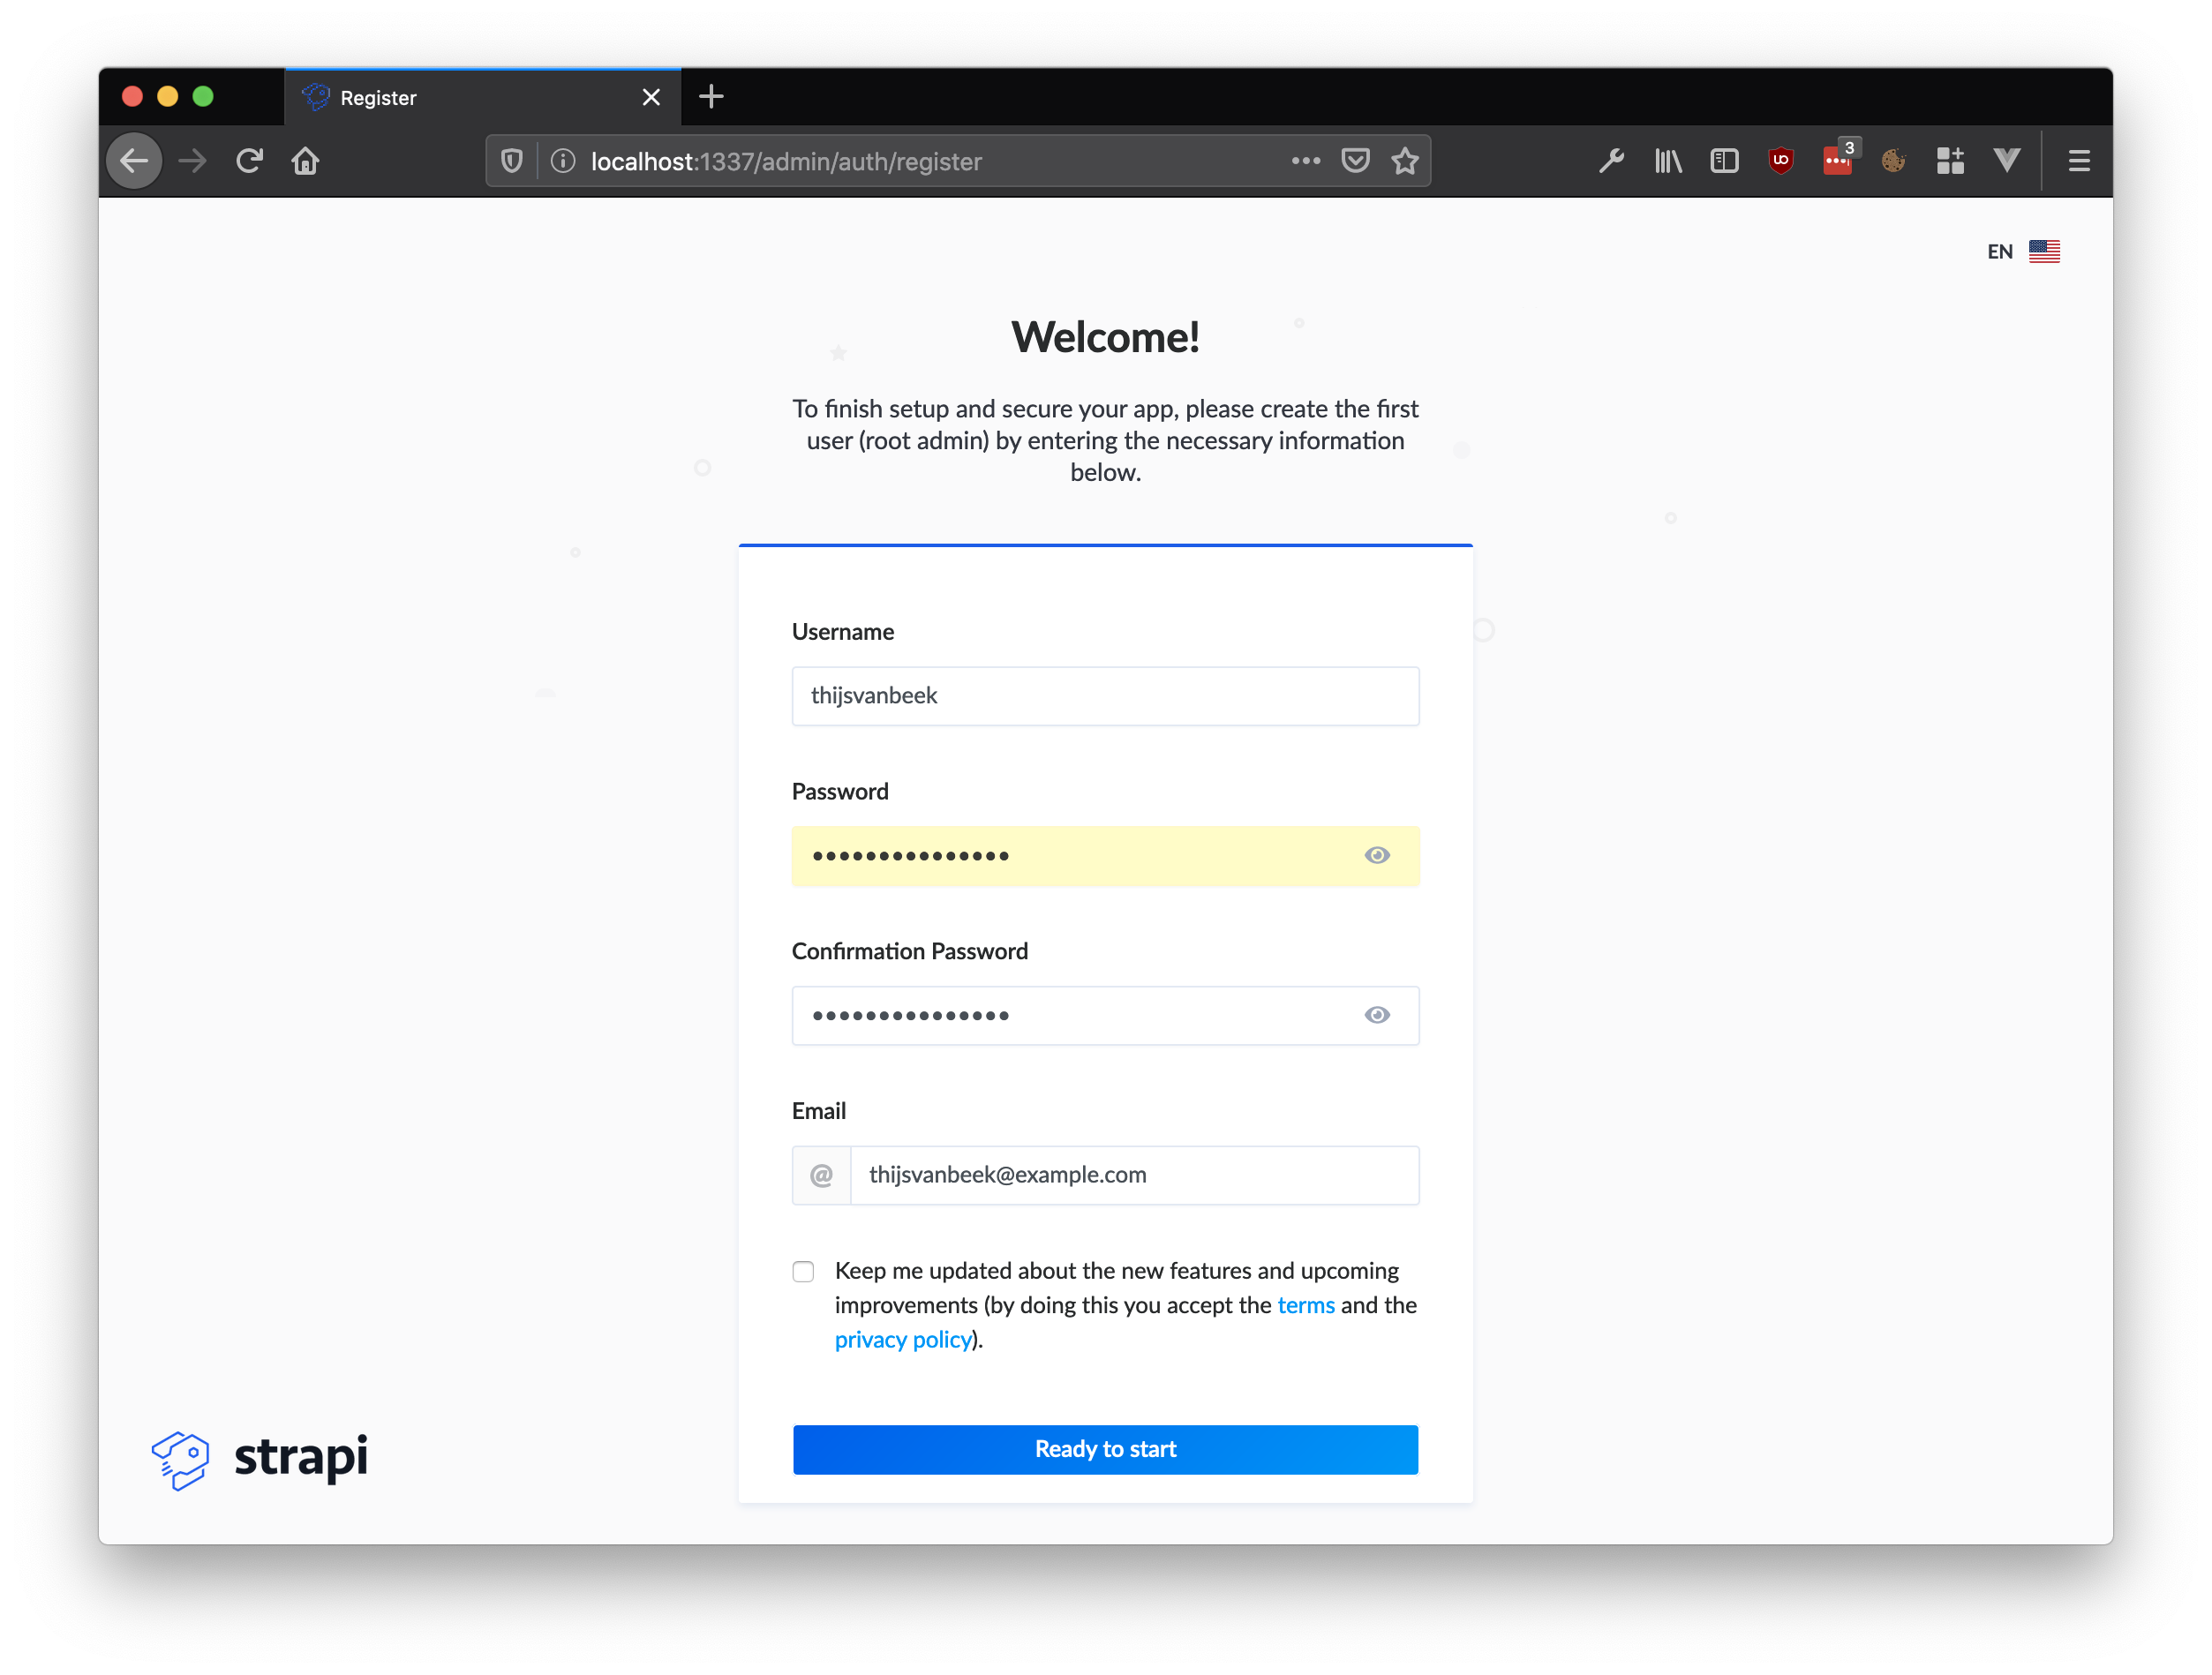
From now on, when you want to visit the Strapi admin interface, you can browse to localhost:1337/admin. But understand that if you close your Terminal window, you also stop Strapi, so you have to start it back up if you want to use it.
To recap, start your Strapi application anytime using the following actions
- Open a Terminal window
- Type
cd path/to/your/project/folderor in this casecd ~/Projects/gallery- Type
npm run developto start the Strapi server- Open a browser and visit localhost:1337/admin
We are done with the nerdy bit. Let’s make a database!
Design a database
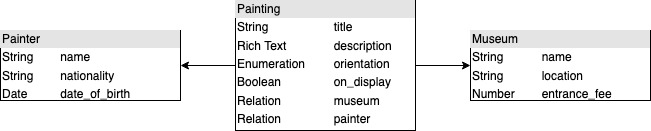
We have to get some terminology out of the way. Our database will consist of three tables: Paintings, Painters and Museums. Each table has several fields, like name, title, subject, etc. The fields have a defined type, so a title field can contain a text String, while the Museum entrance_fee field has to be a Number.
The date_of_birth Date field explains itself. A Boolean field can only be either true or false. The Enumeration field is just like a regular String, but with predefined values to select for data entry.
Each Painting is linked to a Painter and a Museum using a Relation. The totality of our data model is called a Schema and looks something like this.
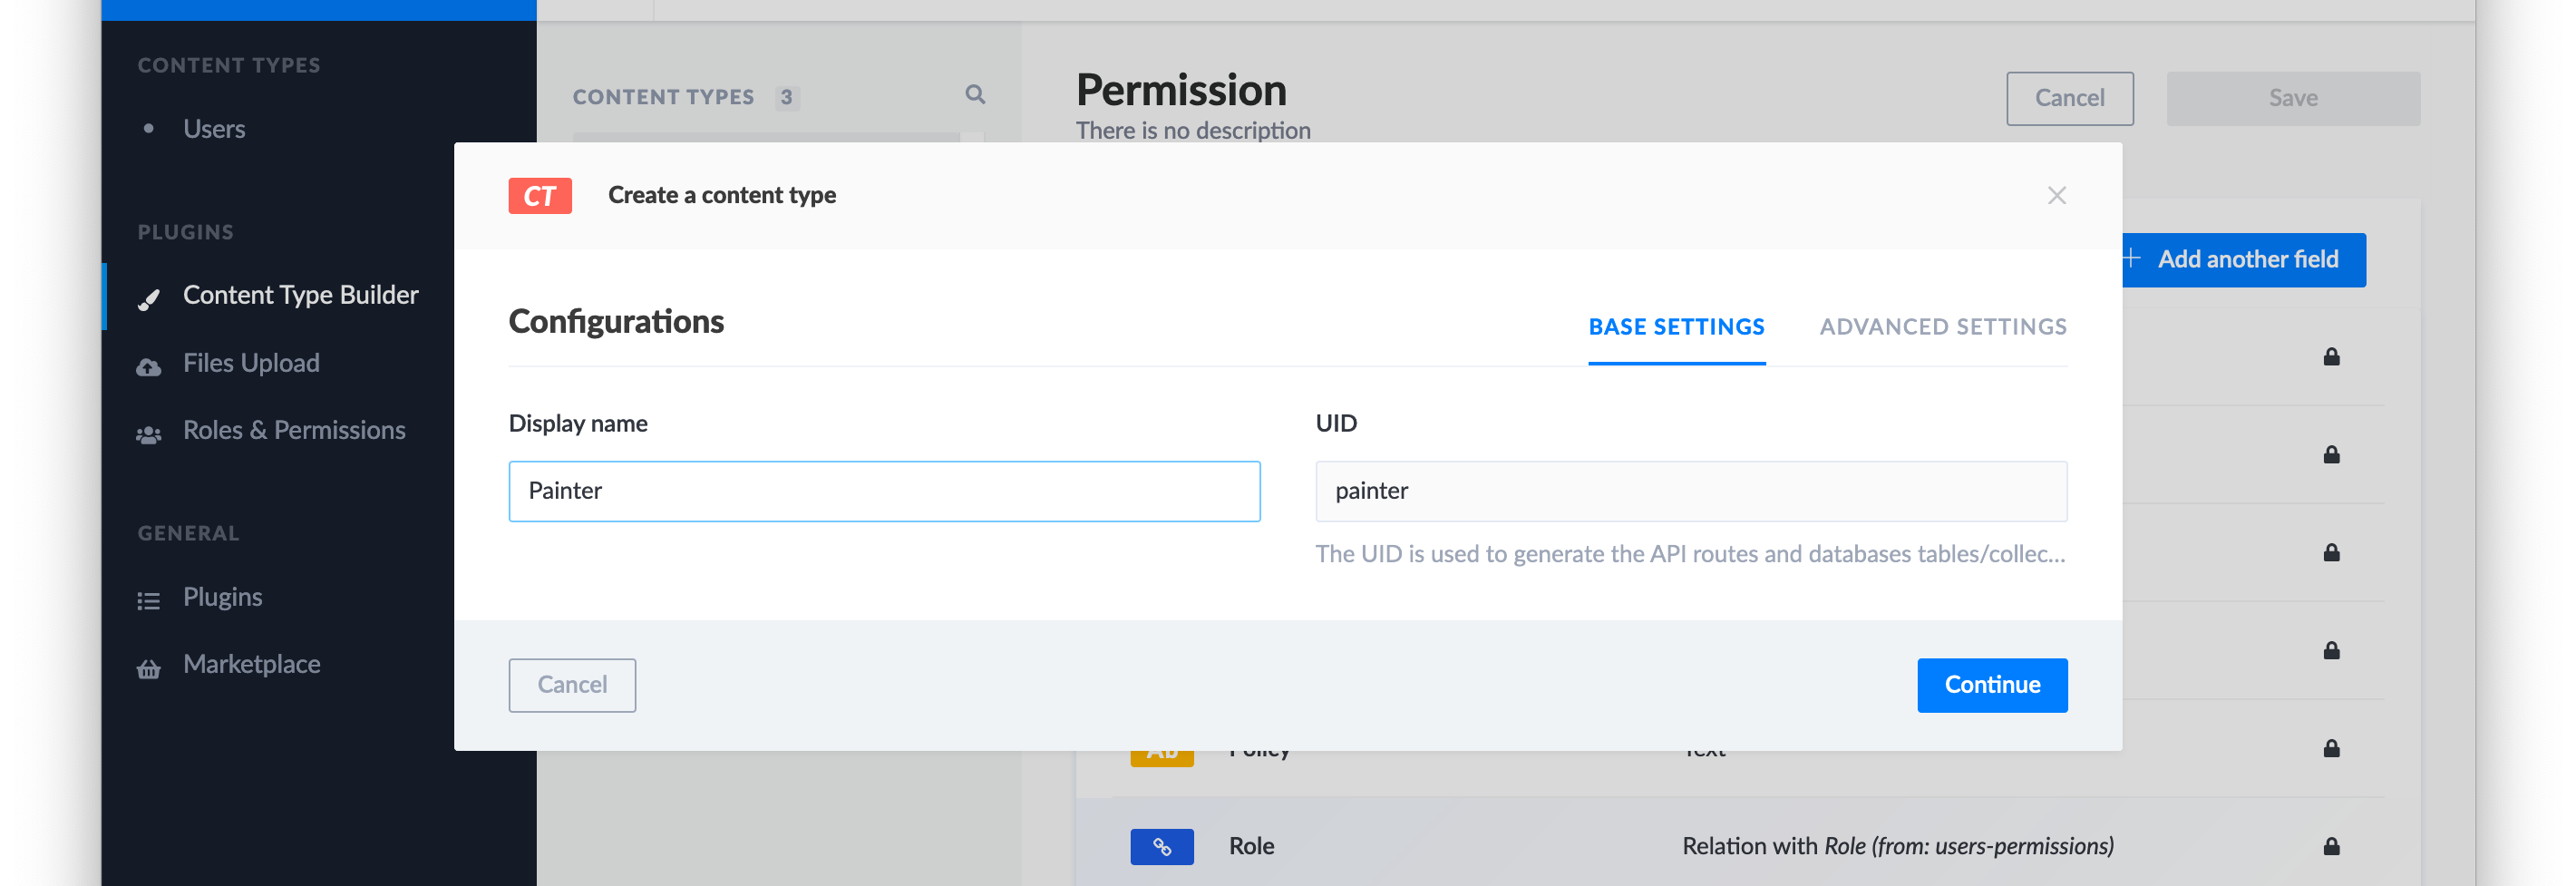
In Strapi, we can create tables by adding a Content Type. So let’s dive in and create one for our Painter table. Click on Content Type Builder in the left-side menu and under Content Types click on Create new content type. Enter Painter under Display name and click Continue.
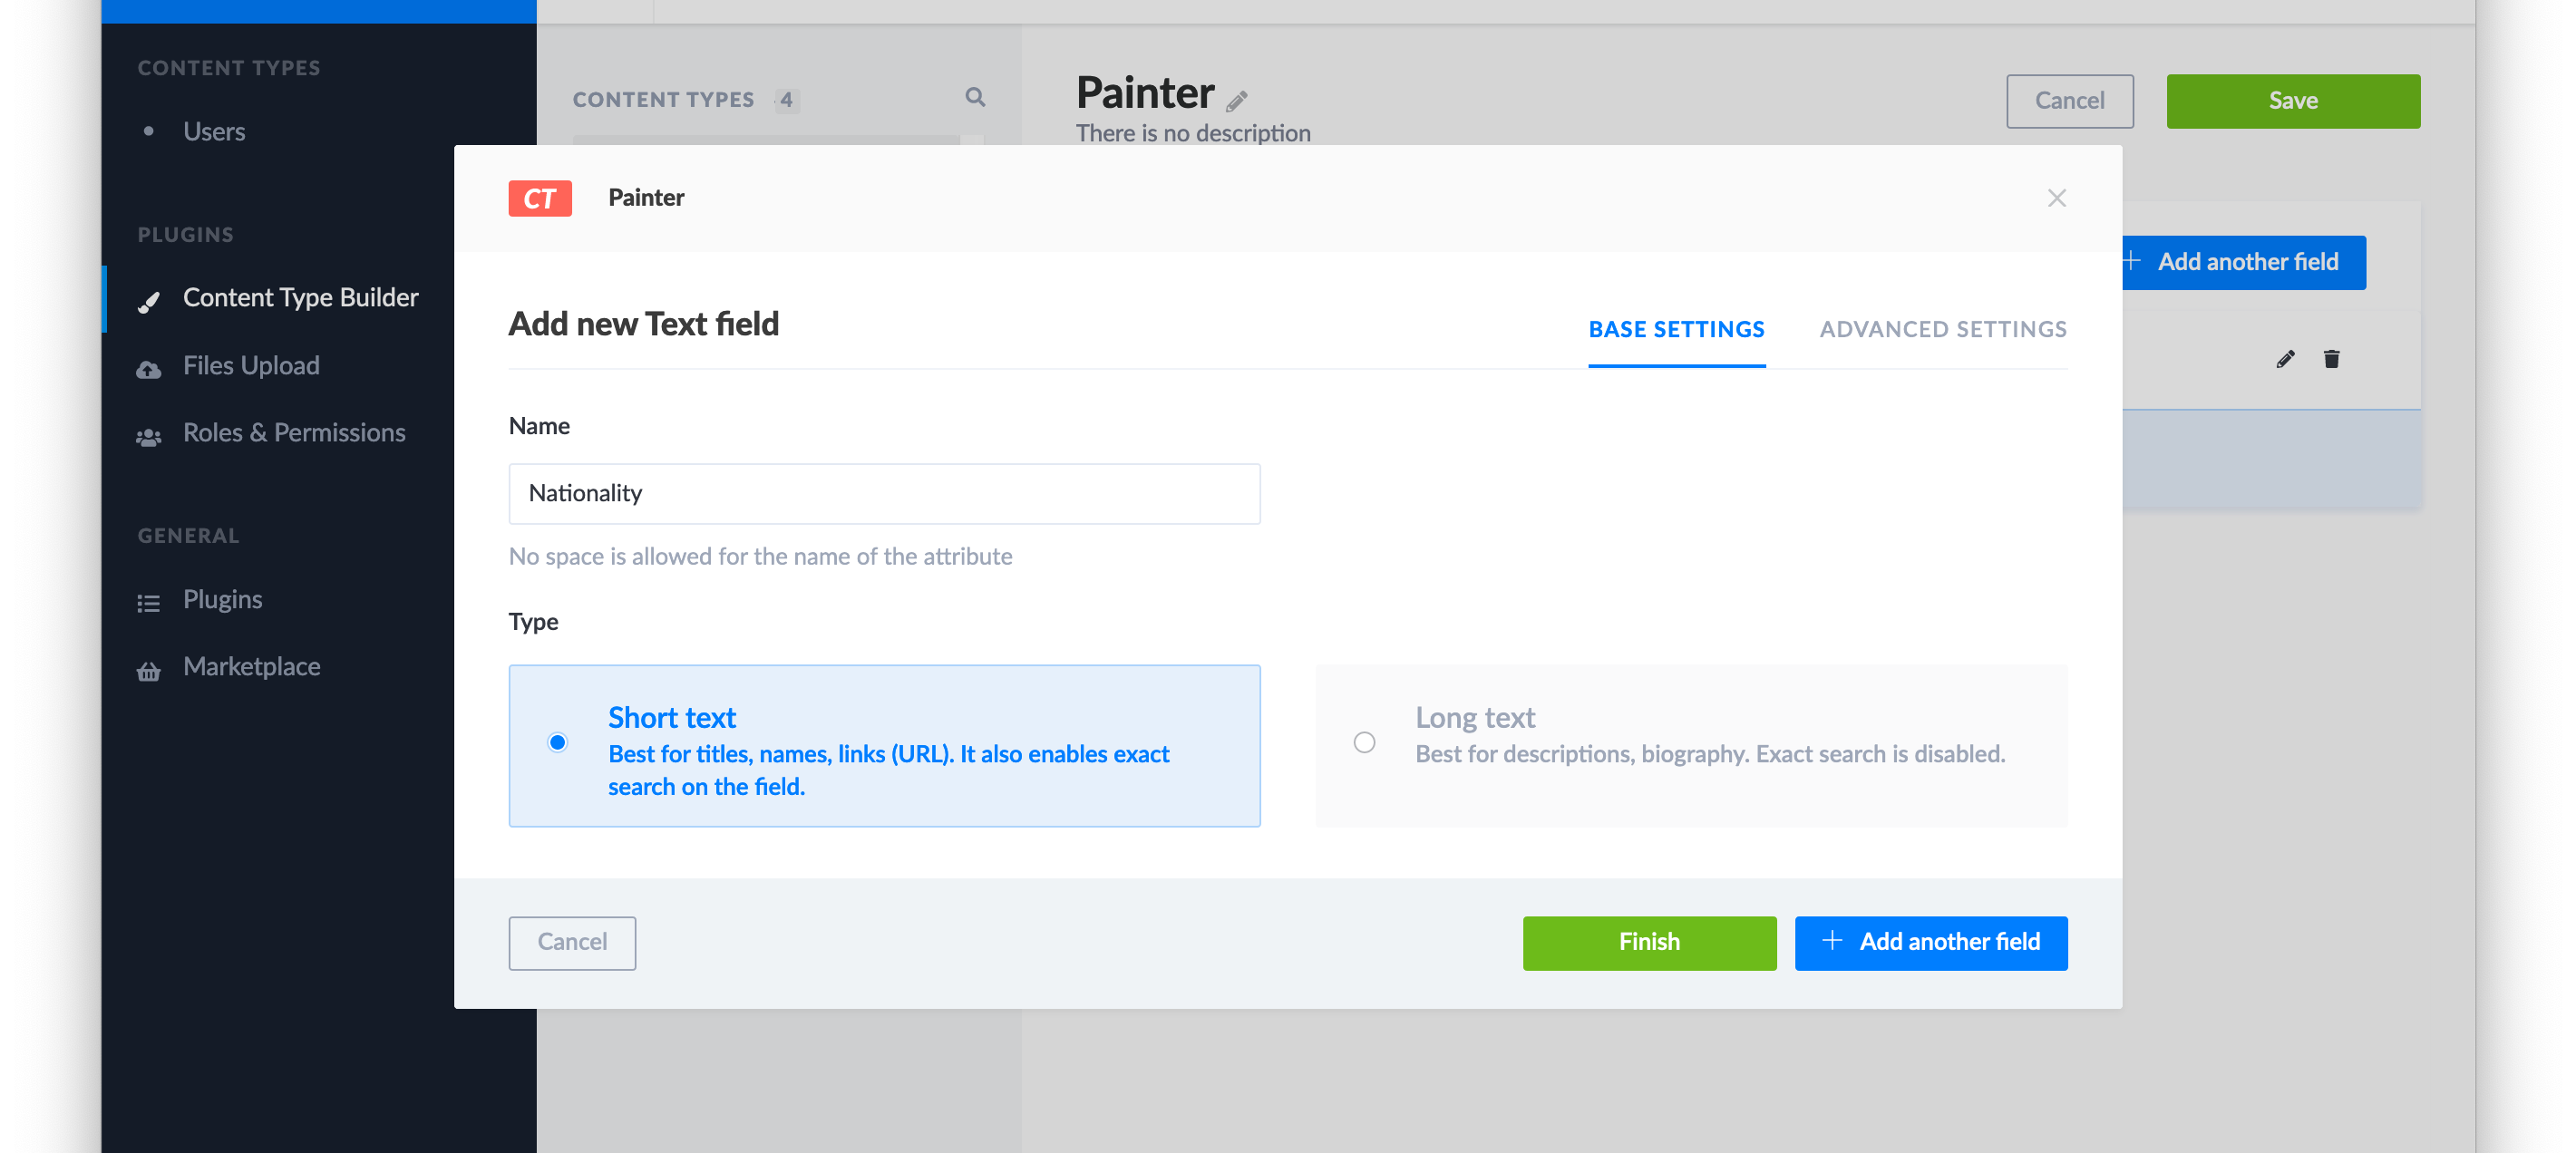
On the next screen we can add fields. Start with a field of Type Text and name it Name. This field will contain the full name of our artist. Add another field, choose String once more and type Nationality.
Again, we add another field, however, this time we choose Type Date. The name of the field is DateOfBirth and the Type is date.
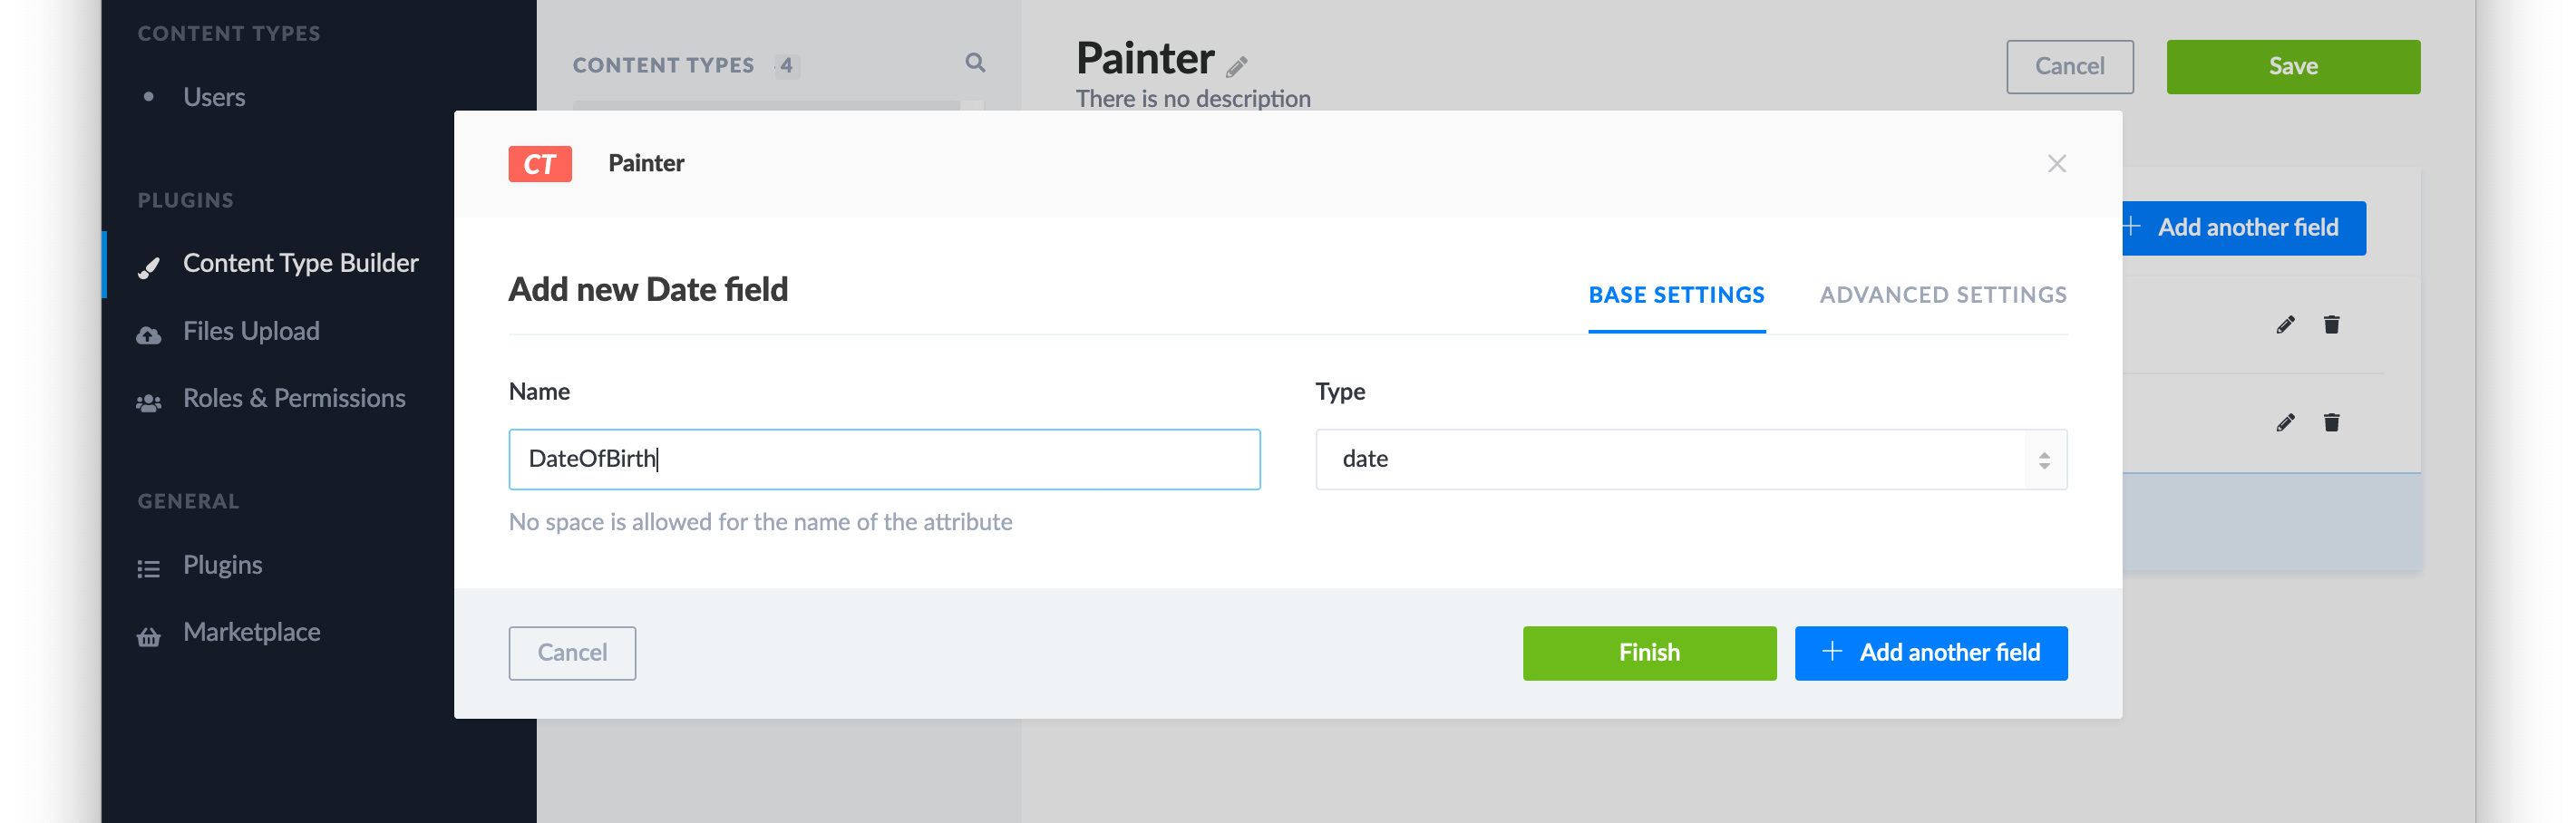
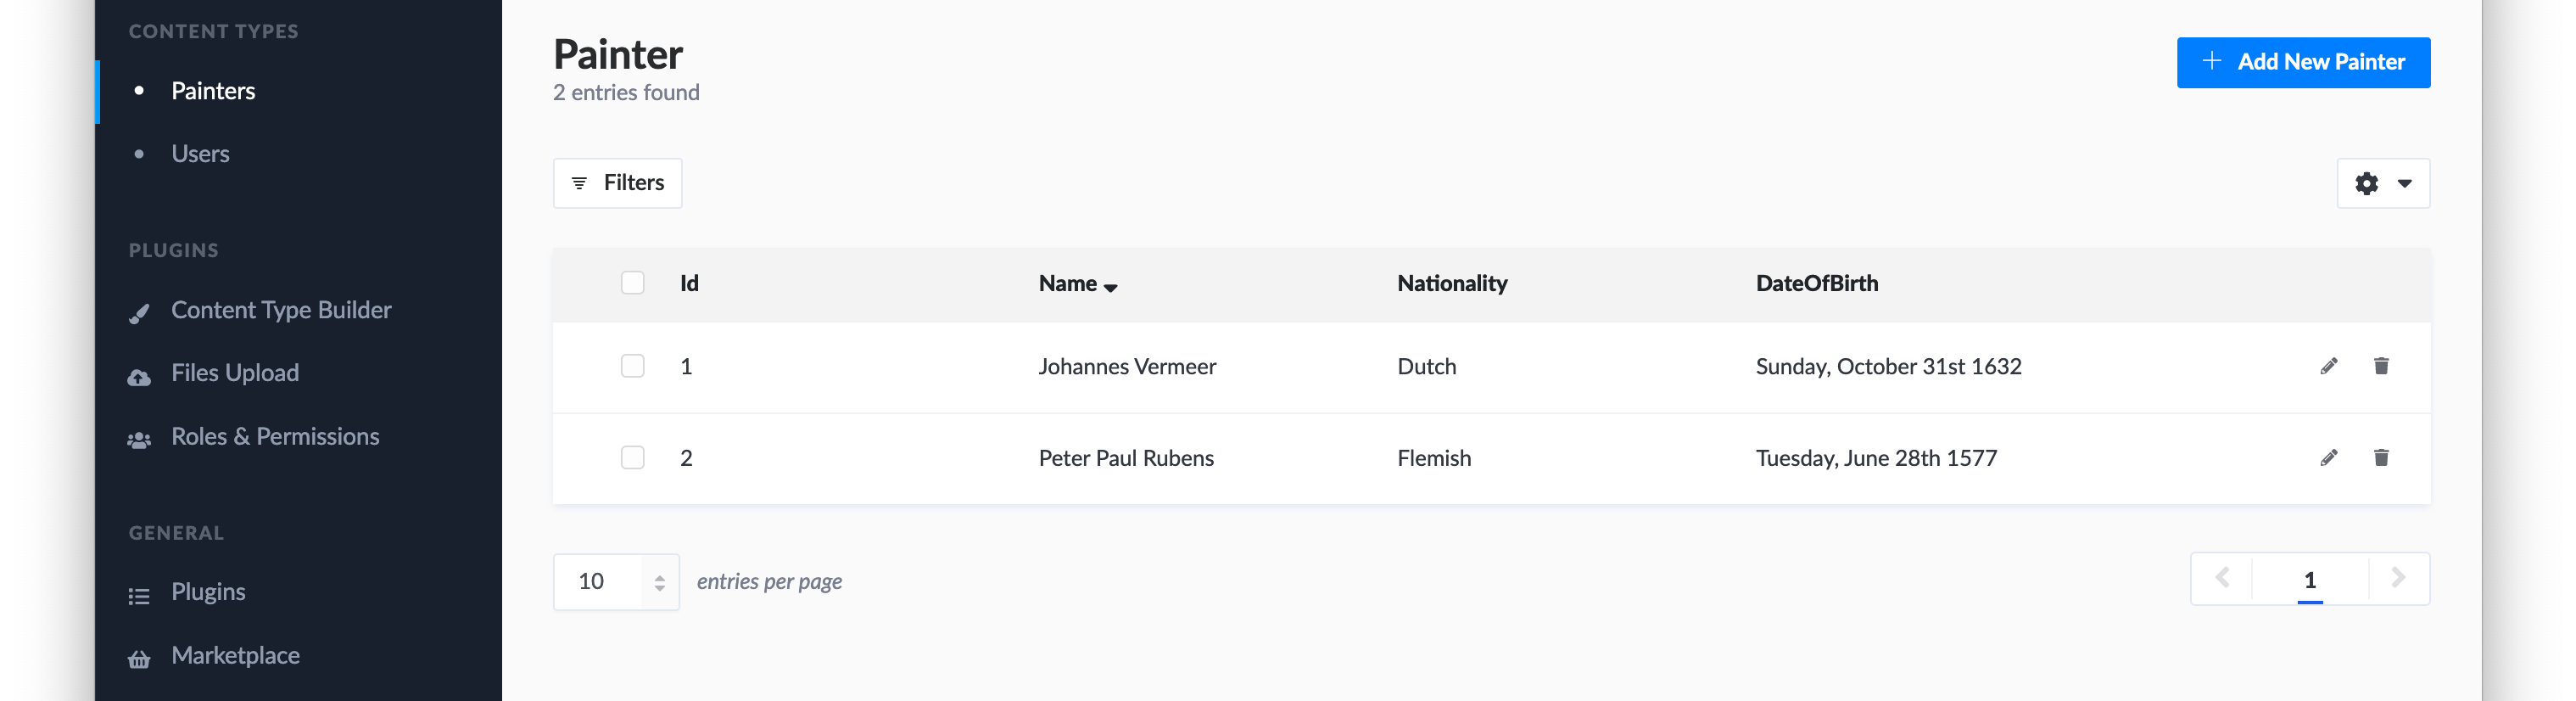
Click Finish and Save and Strapi will restart with Painters added as a Content Type in our left-side menu. Add two painters using the following information:
| Name | Nationality | Date of Birth |
|---|---|---|
| Johannes Vermeer | Dutch | October 31, 1632 |
| Peter Paul Rubens | Flemish | June 28, 1577 |
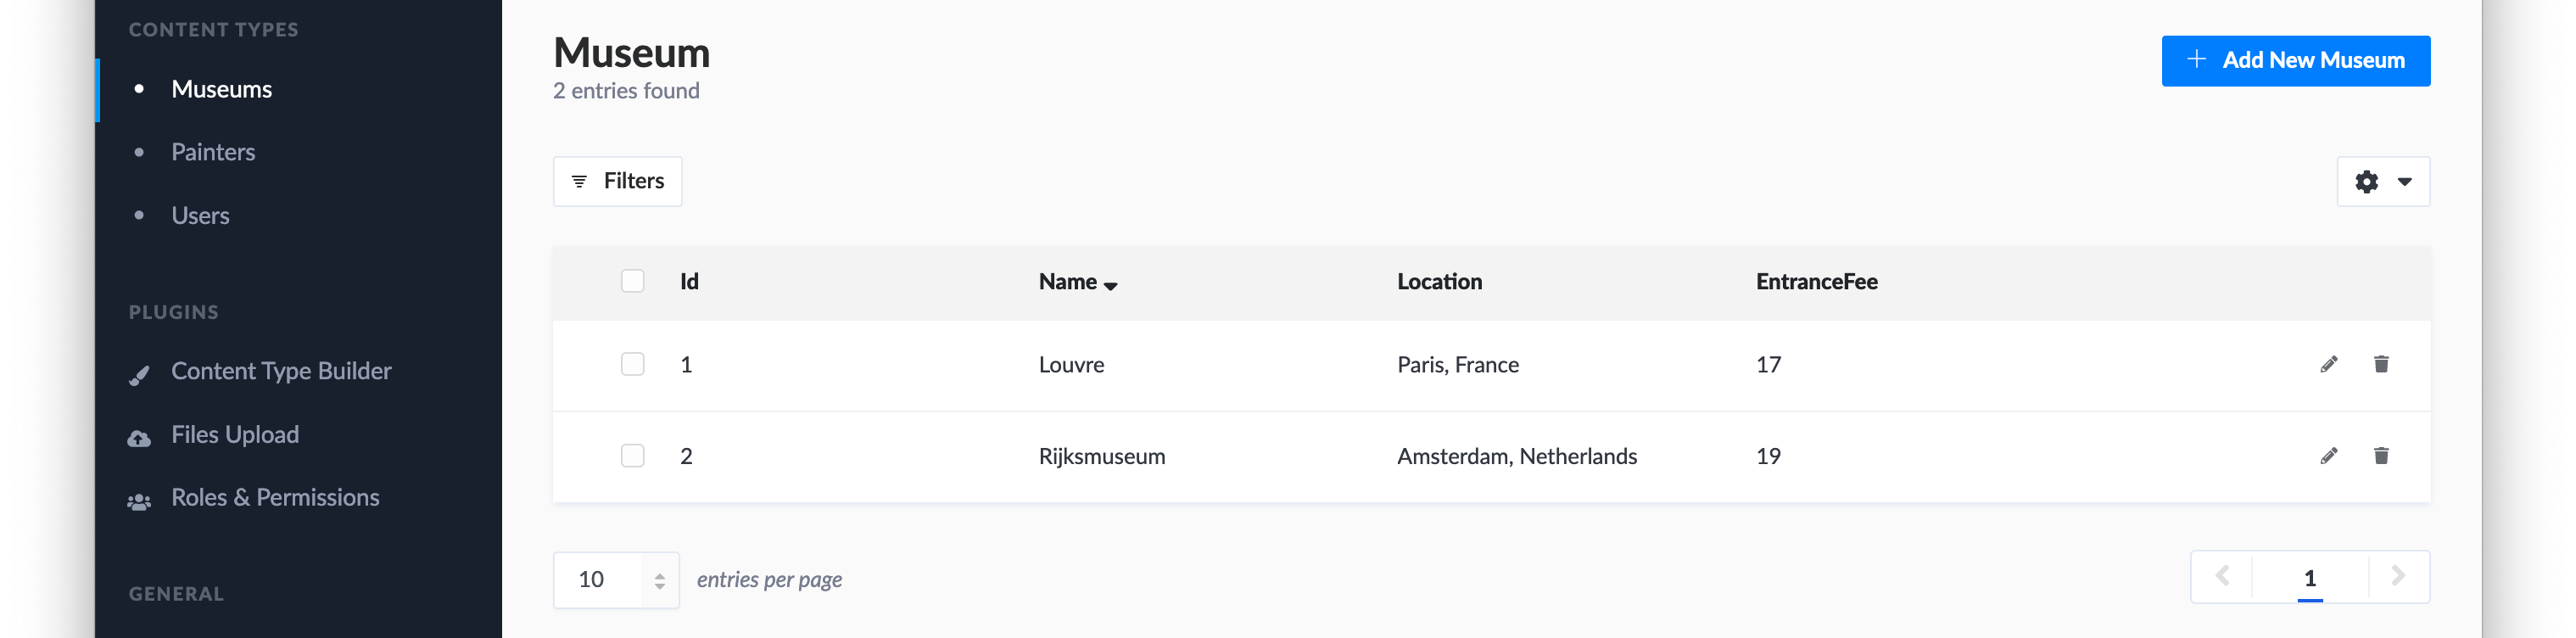
You can now add the Museum Content Type yourself. For Entrance Fee use a Number field with format Decimal.
| Name | Location | Entrance Fee |
|---|---|---|
| Louvre | Paris, France | 17 |
| Rijksmuseum | Amsterdam, Netherlands | 19 |
The last Content Type, Paintings, is a bit more involved, so let’s go through it together.
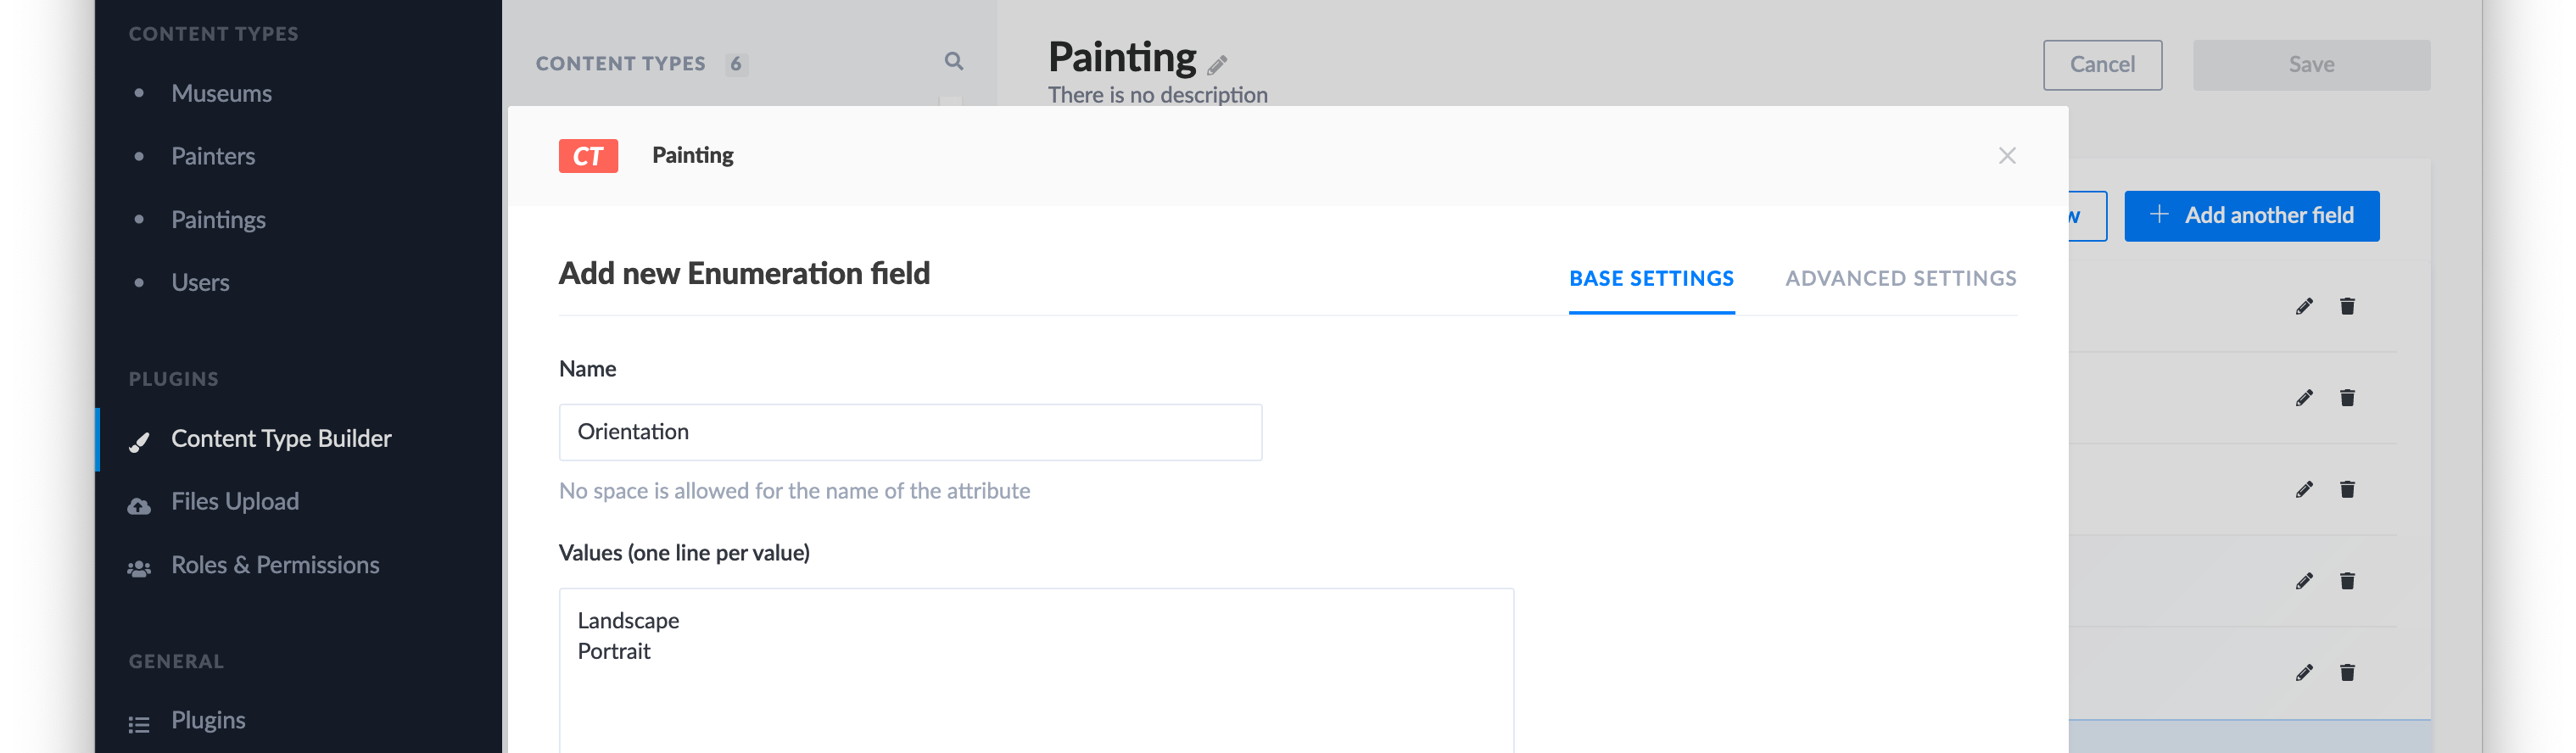
The Title is just a regular String. Description is a Type Rich Text Field which can hold large amounts of text with styling. The OnDisplay field is of Type Boolean. Under Advanced Settings choose False as a default value, and tick the checkbox before Required Field to make this field required. Add a field of Type Enumeration, name it Orientation and under Values (one line per value) type Landscape and Portrait.
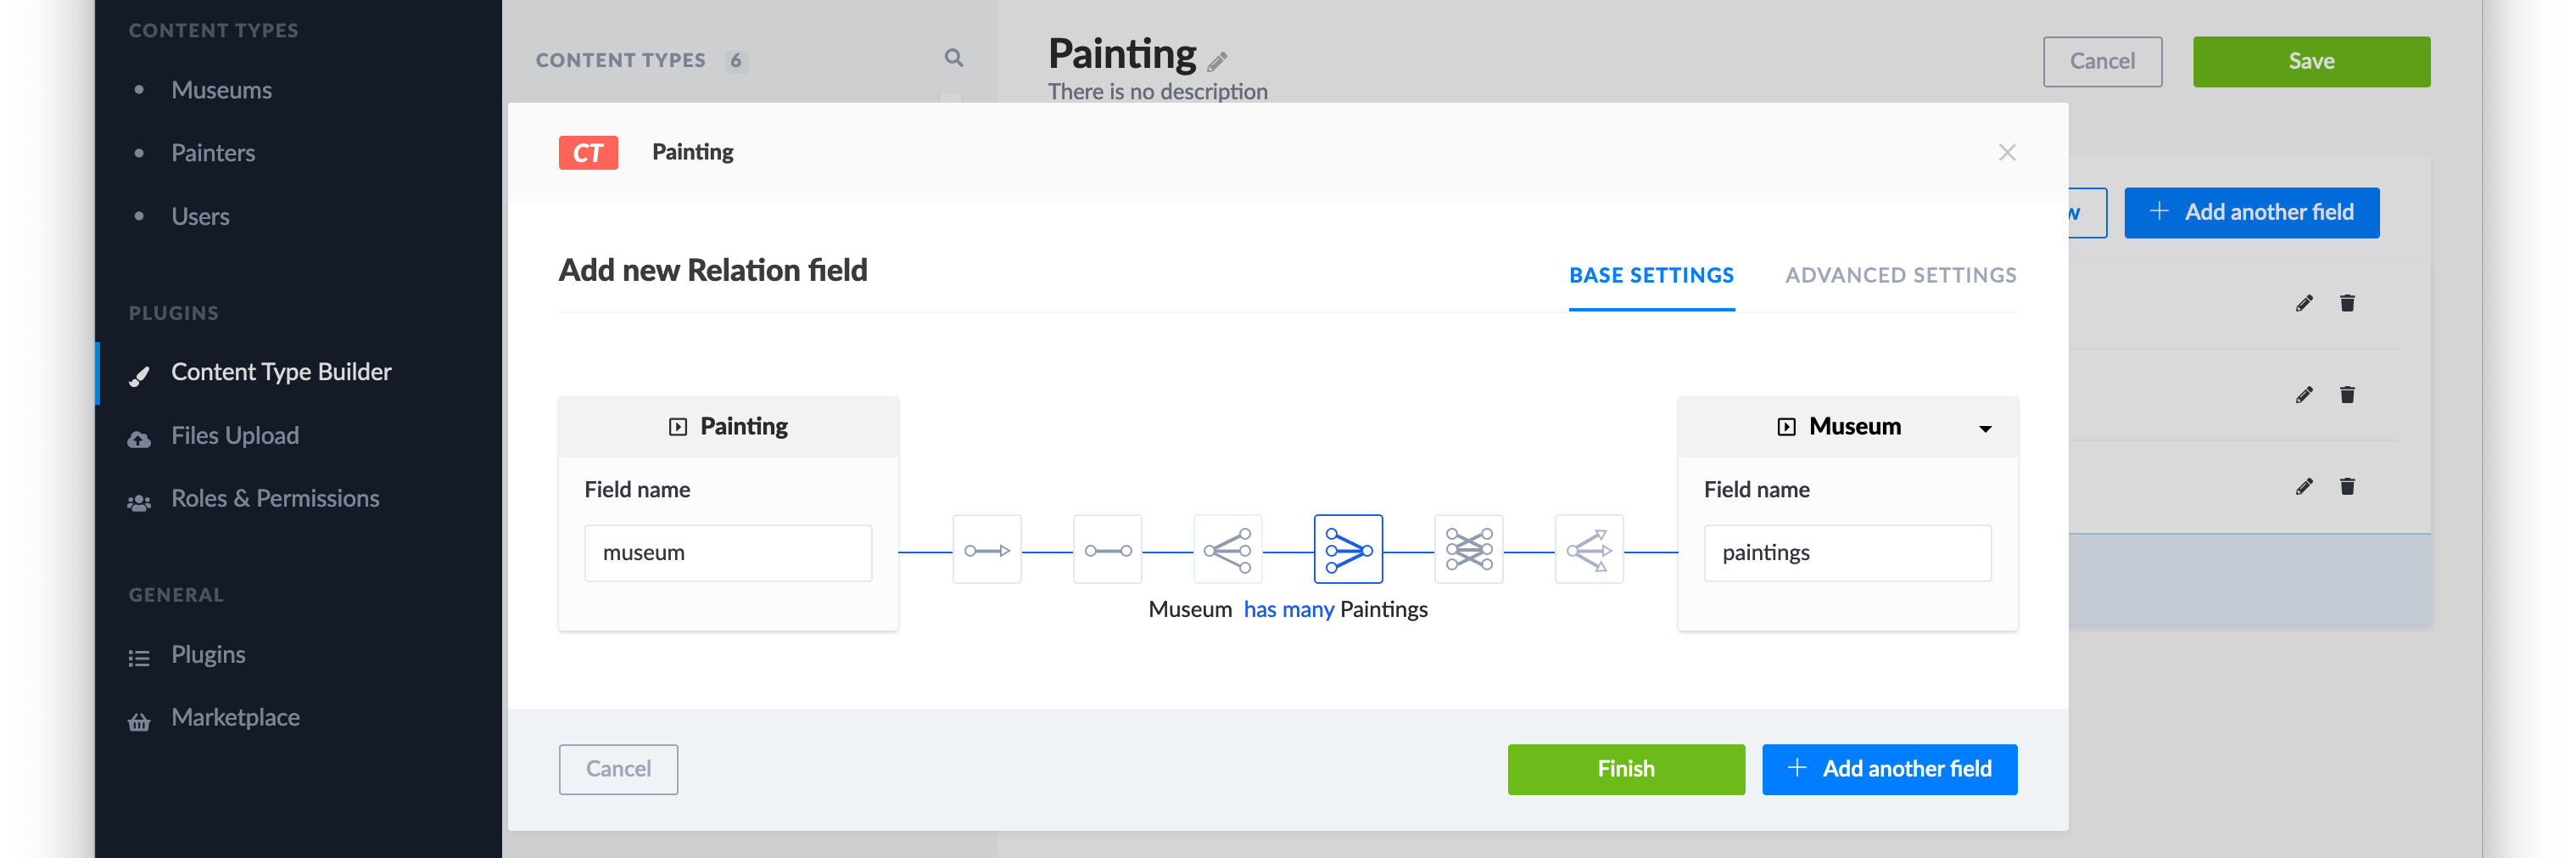
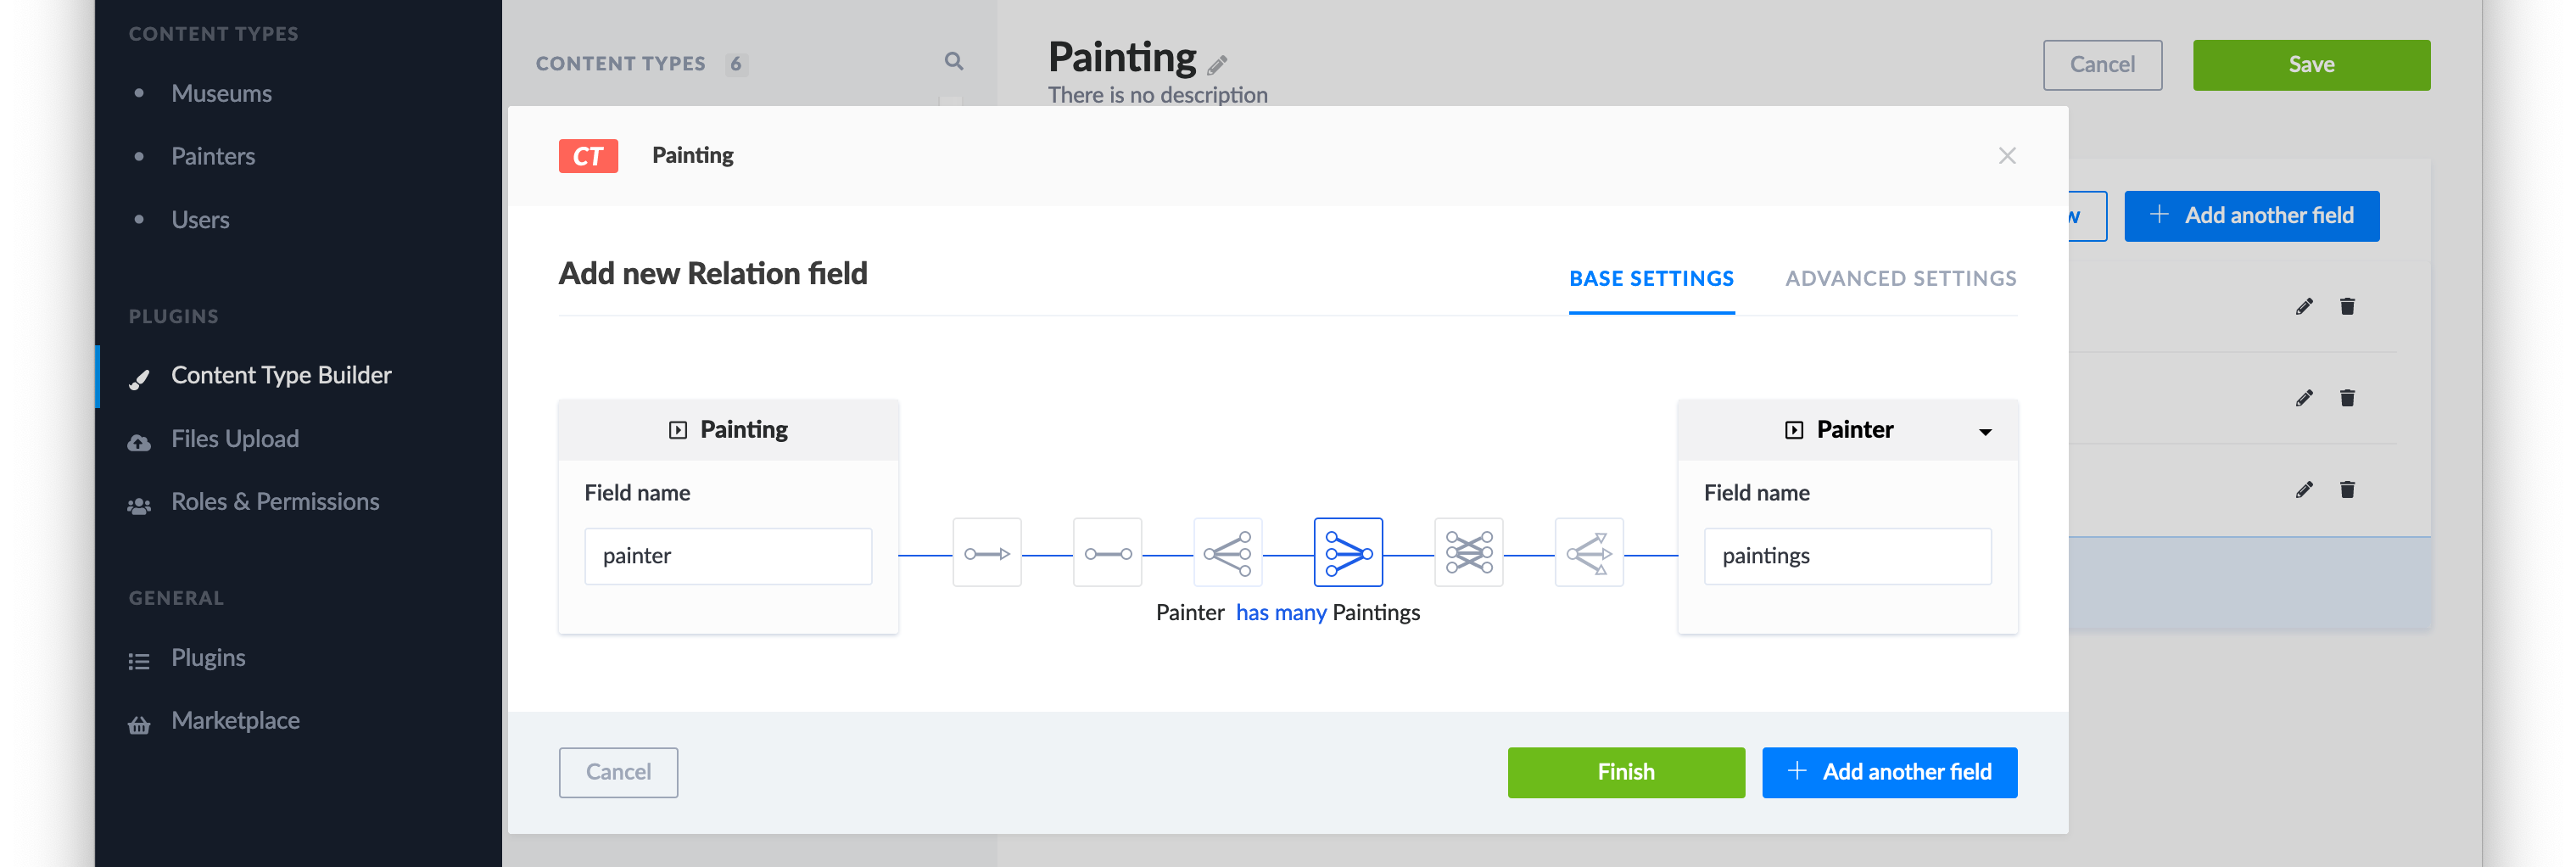
Next, add a field of Type Relation. Click the icon that is described as Museum has many Paintings and Add another field. Again choose Type Relationship, but now select Painter from the right dropdown and click on the icon that is described as Painter has many Paintings. Finish and Save.
Relationships are a key feature of relational databases and important to understand. There are two types of relationships you will encounter most often. The first type is the Has Many (or technically the Many-To-One or 1:N) as you just encountered in the example, where a painting belongs to a single museum, but museum can own many paintings.
Now, imagine a table with visitors in our database and in this table there are records for people like you and me. A museum will have many visitors, and each person can visit many museums. Hence, the second relationship type is Has and Belongs to Many (or Many-To-Many or N:N). Technically, a Painting can have multiple Painters so in our example we could have chosen a Has and Belongs to Many relationship as well.
We are now ready to add our first painting to the dataset.
Title
The MilkmaidDescription
A maidservant pours milk, entirely absorbed in her work. Except for the stream of milk, everything else is still. Vermeer took this simple everyday activity and made it the subject of an impressive painting – the woman stands like a statue in the brightly lit room. Vermeer also had an eye for how light by means of hundreds of colourful dots plays over the surface of objects.On Display
OnOrientation
PortraitMuseum
RijksmuseumPainter
Johannes Vermeer

Next Steps
If you have successfully come this far you can hopefully see how you can turn the example into something useful for your own projects. You now have the skills to setup a very powerful, rich and complex dataset.
Strapi documentation
It might be a good idea to go trough the documentation for Strapi, just so you can see what other options there are, such as adding images and other media to you dataset.
Backups
It is best to backup the complete project folder. However, if there is one thing you should make sure to backup, it is the file ~/Projects/gallery/.tmp/data.db. This is de database file containing all your record entries.
Please note that the .tmp folder might be hidden on you Mac. Press CMD+SHIFT+. (that is a period character) in Finder to make hidden files and folders visible.
Data Analysis
In our installation we used the default database, SQLite, because it doesn’t require to run a dedicated database server, but instead the actual database is just that one file. You can even open data.db using for instance the free tool DB Browser for SQLite and browse and query your data. Or you can share the file with a web-developer who can easily use it to build a cool website around your dataset, or with a data scientist who can write advanced queries.
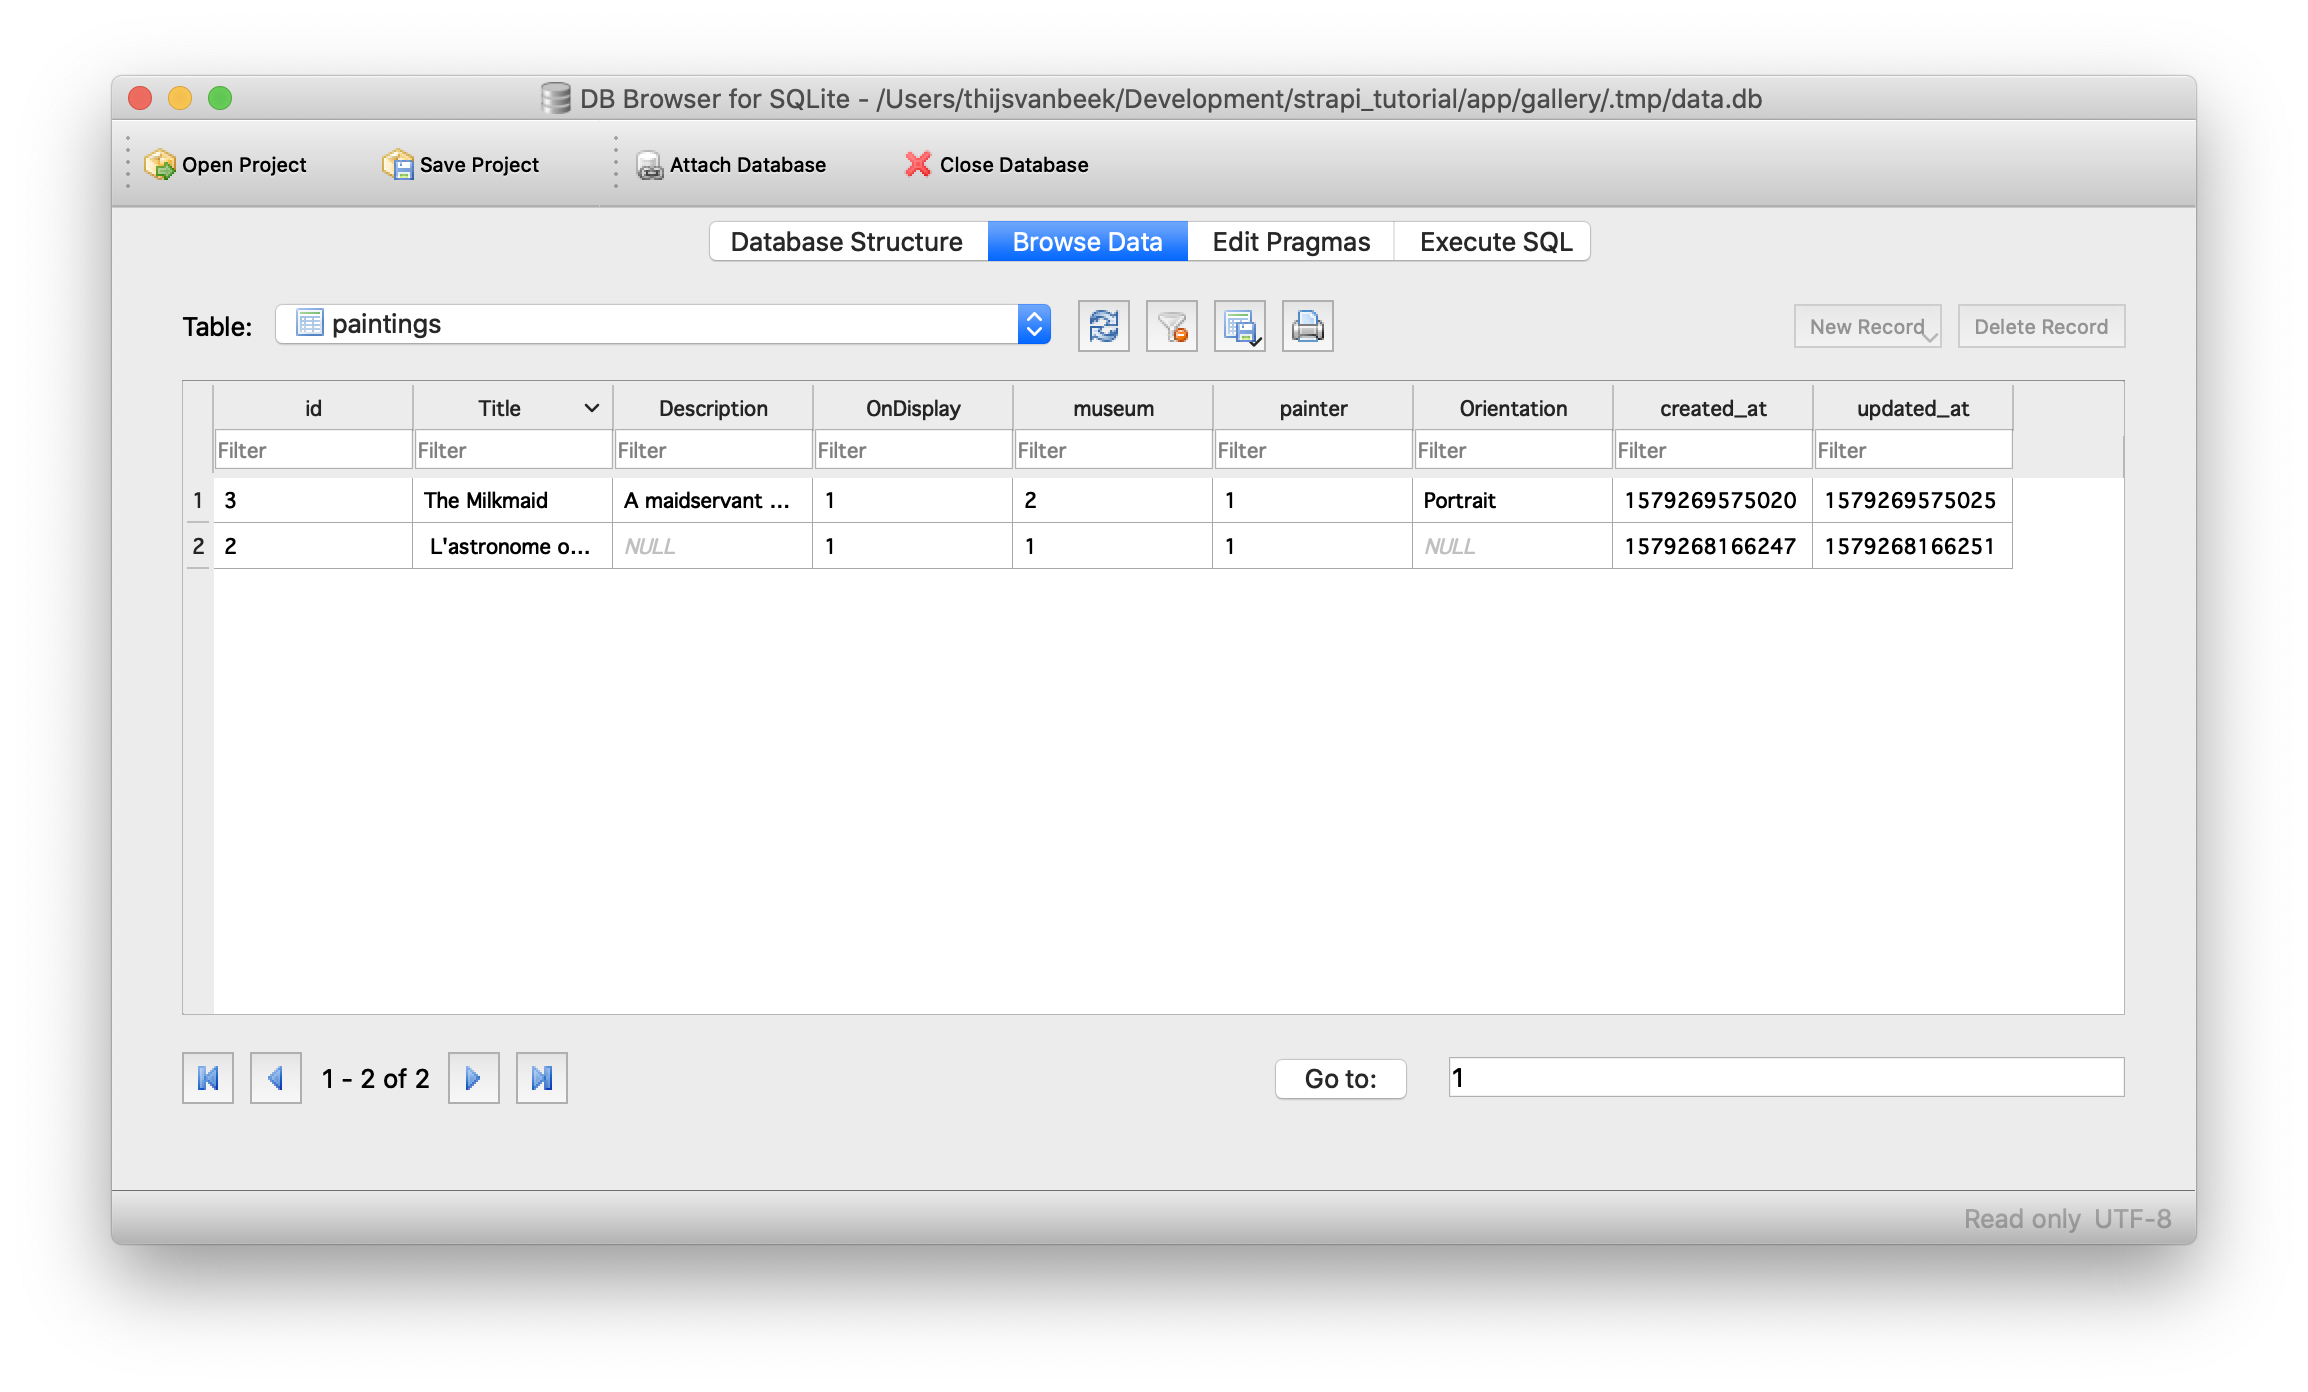
I added a few more paintings to make the examples more interesting. Let’s write a SQL query to find all paintings and display the painter and the museum.
SELECT
paintings.title as Painting,
paintings.OnDisplay as "On Display",
painters.name AS Painter,
museums.name AS Museum
FROM paintings
LEFT JOIN painters ON paintings.painter = painters.id
LEFT JOIN museums ON paintings.museum = museums.id| Painting | On Display | Painter | Museum |
|---|---|---|---|
| L’astronome ou plutôt l’Astrologue | 1 | Johannes Vermeer | Louvre |
| The Milkmaid | 1 | Johannes Vermeer | Rijksmuseum |
| Woman Reading a Letter | 1 | Johannes Vermeer | Rijksmuseum |
| View of Houses in Delft, Known as ‘The Little Street’ | 0 | Johannes Vermeer | Rijksmuseum |
| The carrying of the cross | 1 | Peter Paul Rubens | Rijksmuseum |
| L’Apothéose d’Henri IV et la proclamation de la régence de la reine | 0 | Peter Paul Rubens | Louvre |
Maybe we can find out how many paintings by Vermeer are currently on display at the Rijksmuseum.
SELECT
COUNT(*) AS Amount
FROM paintings
LEFT JOIN painters ON painters.id = paintings.painter
LEFT JOIN museums ON museums.id = paintings.museum
WHERE paintings.OnDisplay = 1
AND painters.Name = "Johannes Vermeer"
AND museums.Name = "Rijksmuseum"| Amount |
|---|
| 2 |
SQL, or Structured Query Language, is a very powerful language for querying relational databases. Getting familiar with it is in my opinion a very smart investment to make for anyone who works with datasets. Its also fun, and easy to learn! There are many free online courses such as this one: codecademy.com/learn/learn-sql.
API
Strapi comes with its own REST API (and you can even enable GraphQL as a Plugin).
While the API is enabled by default, we do have to set a few permissions first to enable access. In Strapi, browse to Roles & Permissions, edit the permissions for the Public role and enable count, find and findOne for each Content Type and Save.
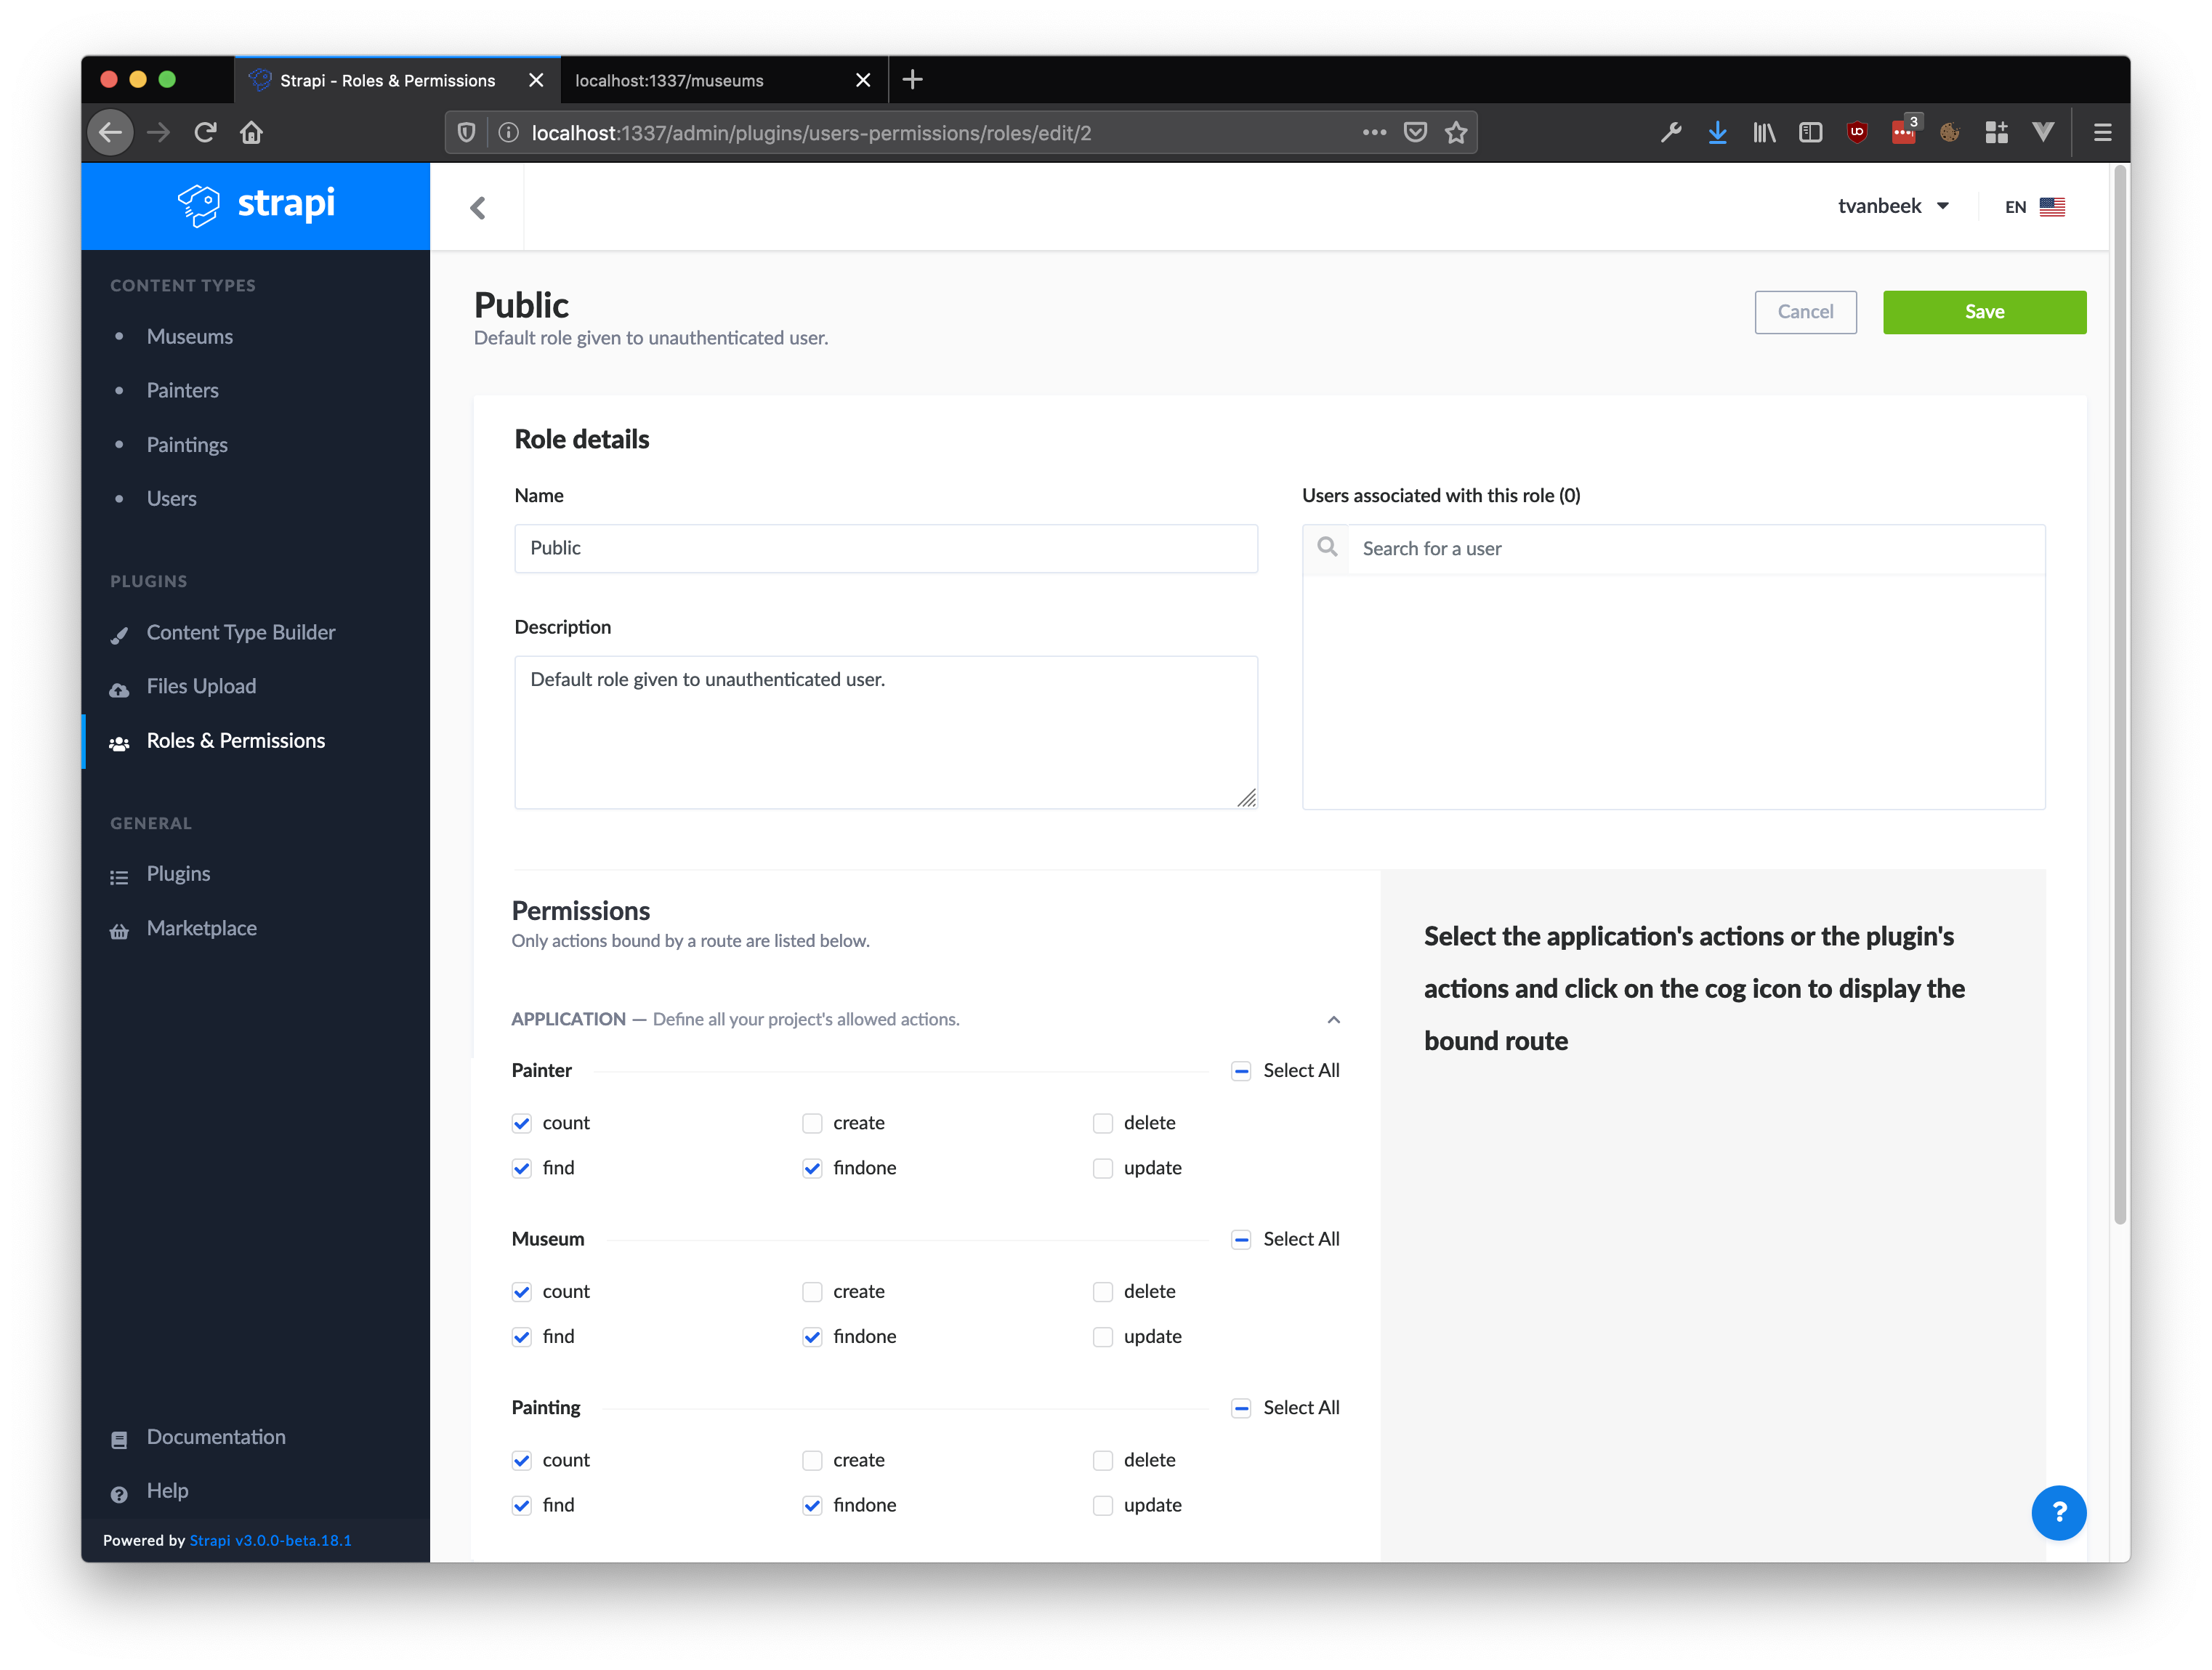
Now you can browse to http://localhost:1337/museums in your browsers and you will be presented with an array of JSON objects for each museum. If you browse to http://localhost:1337/museums/2 you request the information for museum with id#2 and the return value is a single JSON object.
